It’s getting warm over here! Time to make your favorite treat for a summer day: Ice Cream! Skip the sugar, and the tedious churning process (for those who don’t have an Ice Cream maker).
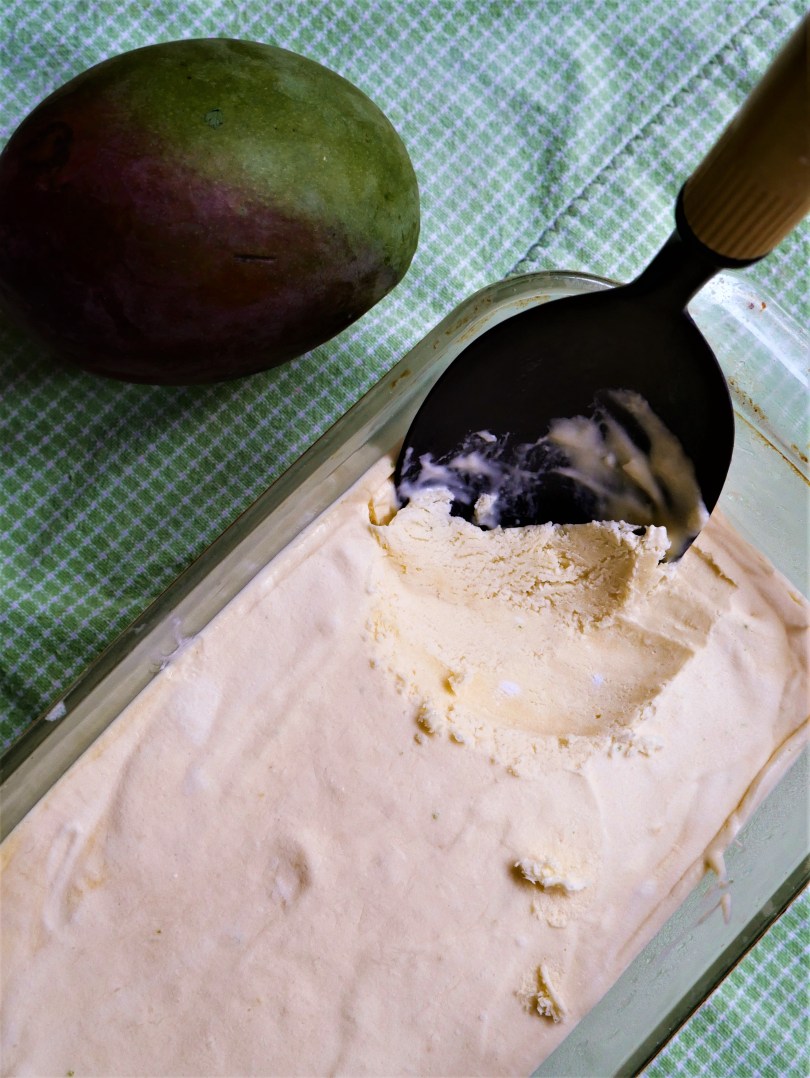
It’s getting warm over here! Time to make your favorite treat for a summer day: Ice Cream! Skip the sugar, and the tedious churning process (for those who don’t have an Ice Cream maker).
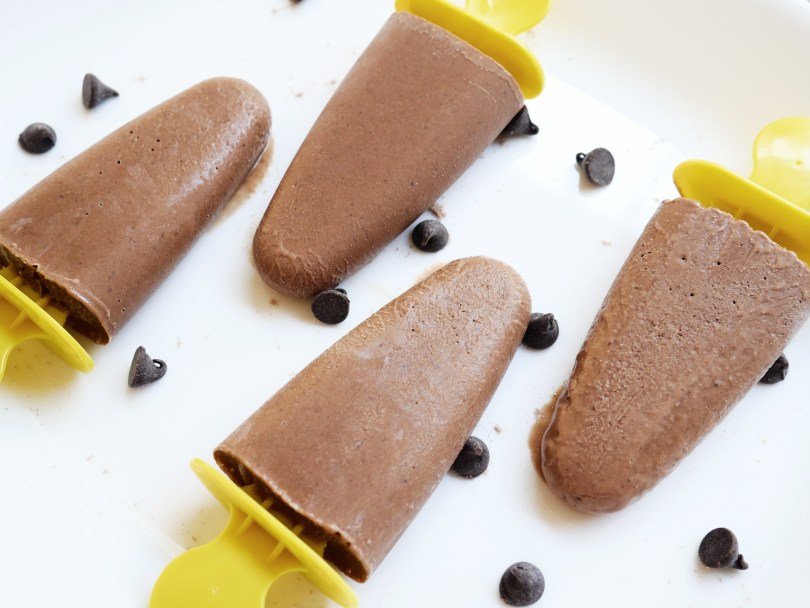
We’re finally warming up here, at least in Southern California, so now’s the time to pull out your frozen treats and cool drinks! Most of the time, though, your frozen treats may be things like Otterpops, which are little else than a mixture of corn-syrup and food coloring, or like Kool-Aid, which has ingredients that are impossible to pronounce, and also has food coloring. Sometimes your healthiest option is to make your own, and in this post, I have a recipe for Protein Popsicles! It’s exactly what it sounds like – popsicles with protein powder in them.

What’s the first recipe I’ve made? Answering that question brings me back to way back in time, way back when I was only nine years old.

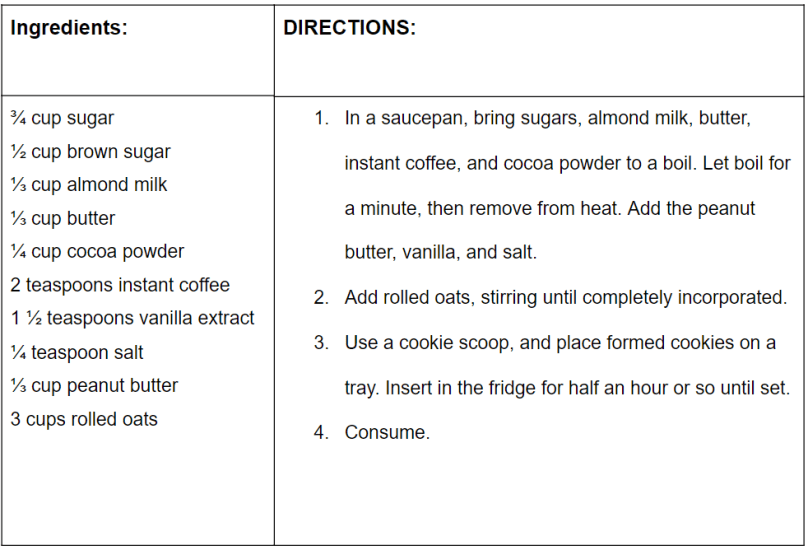
Want to whip up a quick snack that you can store and bring out whenever you want it? These chocolate no-bake cookies are delicious morsels with optional hints of coffee and peanut butter mixed in. They do not require to be baked, and are EGG AND GLUTEN FREE.

The beginning process does require heating in a saucepan in order to dissolve the sugar, but that is pretty much all the heat you’ll need. The rest is just as simple as adding ingredients, shaping, and cooling. And then comes the most important step, which is eating.
If you are looking to cut down on sugar, you could try substituting honey instead of the sugar, but it’s up to you.
Now for a little unrelated poem I wrote before the recipe (scroll down for recipe)d
Advertising
A Poem by Michael Metzler JR.
.
Come buy our products!
They’re the best!
They’ll stand against your every test;
So come and buy them from our store.
.
The quality is there to see–
Soon, you’ll find no fakery.
So come and buy them from our store.
.
The warranty is so long and wide,
You cannot see its either side.
So come and buy that separately.
.
We aren’t liars–you can tell.
We don’t merely just want to sell.
But we need you quickly at our store.
.
See, we’re hoping, while you’re here,
You’ll buy other stuff without fear.
As long as you come quickly to our store.
.
“Advertise” is the thing we do!
We never tire–we’ll show you!
Just come and buy stuff at our store.


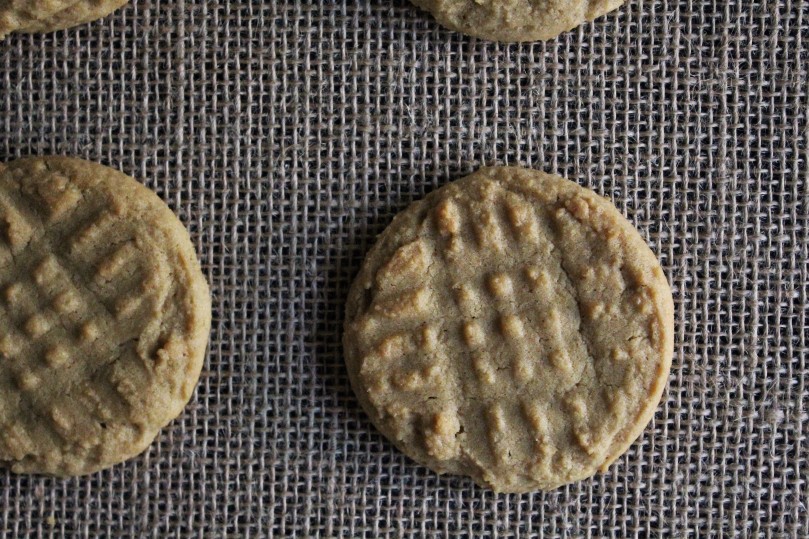
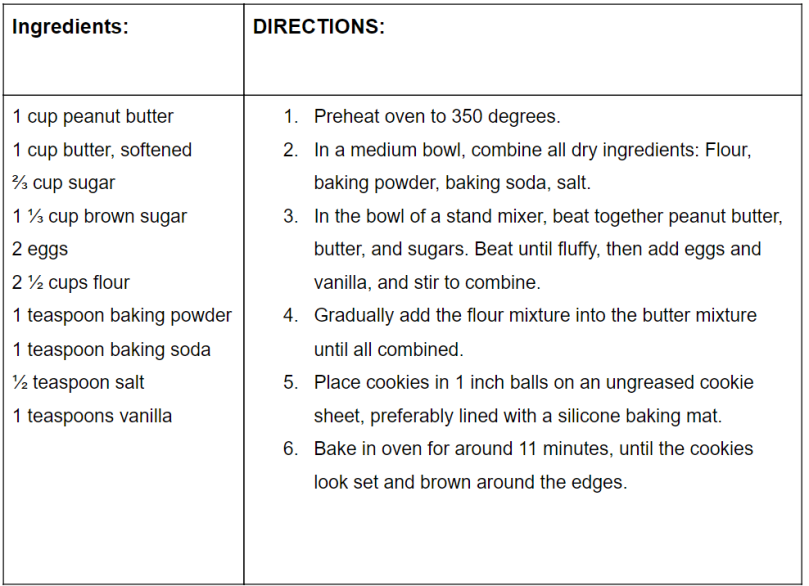
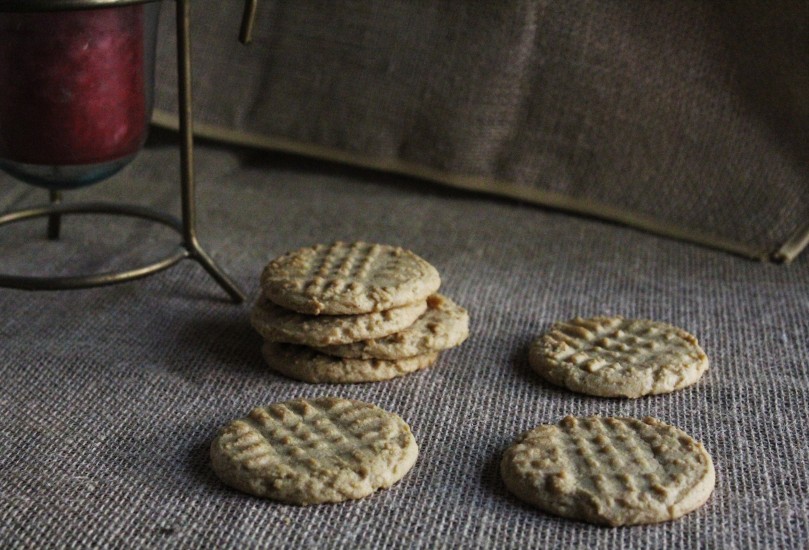
Peanut Butter Cookies are amazingly simple to make, and require no special ingredients other than the peanut butter. The result it a perfectly chewy cookie with a rich peanut butter flavor.
Try these for yourself. (recipe makes approximately 36 cookies)

I realize this is my first post in a while, since I’ve been rather recently busy.
This summer I went to an AWESOME summer camp in the mountains. Generally, the food for every meal was amazing. This particular recipe I made, these “Chewy Chocolate Cookies with White Chocolate Chips,” were inspired by the cookies that were served one evening at that summer camp. My goal was to get them nice and chewy, and rich and chocolaty–very much like the ones at camp, and I think they turned out amazing.
The second time I made them, (and by suggestion of one of my friends), we added crushed Heath Bars to the mix and it tasted PERFECT. So feel free to do that as well, but it is purely optional.
So try them out; if you love chocolate, you’ll love these cookies!


These almond butter chocolate chip cookie treats are a great & easy way to snack.

The almond butter adds protein and fiber while the coconut oil adds healthy-ness and moistness. These cookies are just as easy to throw together as any other cookie, but are healthier in some ways…not to mention extremely delicious. Enjoy!


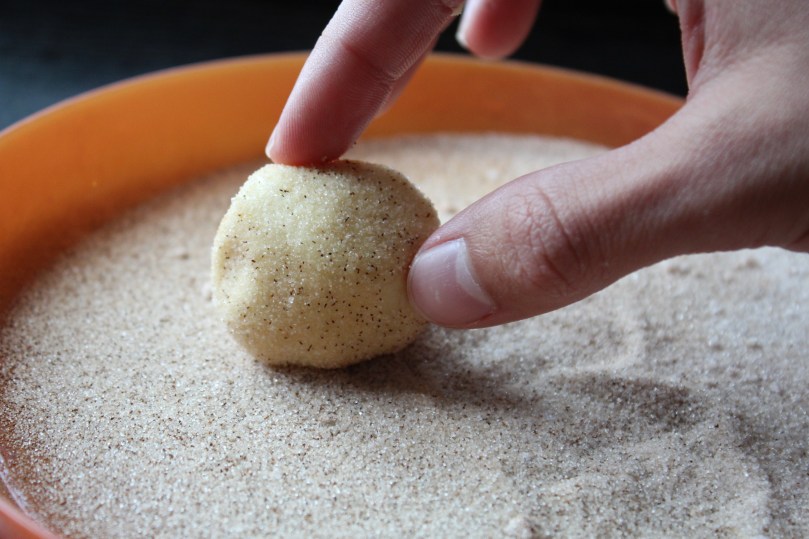
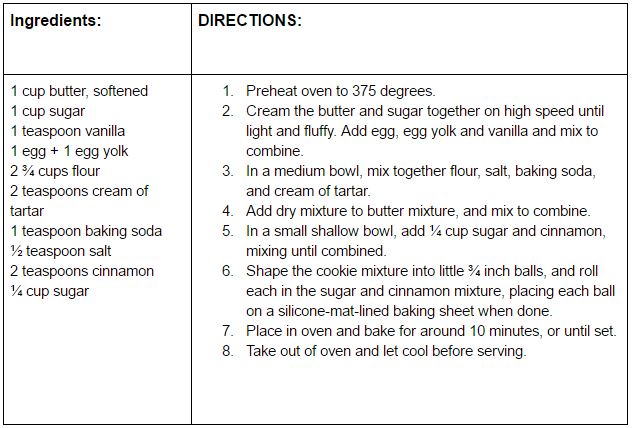
This is a quick & easy recipe for the classic soft snickerdoodle cookie. Serve as dessert with ice cream, or devour it simply as a snack.
Delicious balls of nostalgia rolled in a coating of excellence; serve with a cup of cheer and enjoy.

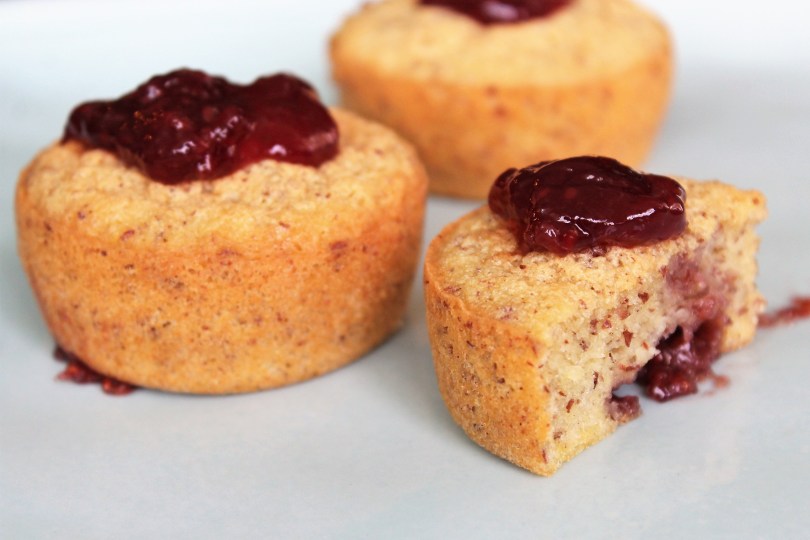
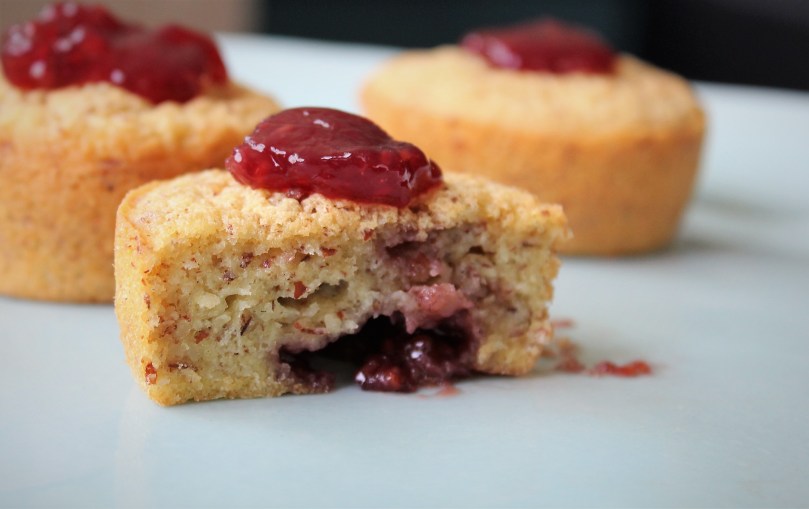
These Almond & Fruit Cupcakes are simple and fast to make, happen to be gluten-free, and hold very little sugar. This makes them quite versatile, and can be served primarily at breakfast, lunch, eaten even as an after-dinner light dessert, or just snacked on whenever (in moderation).
Enjoy with a topping of your favorite fruit jam.

I based this recipe off of the New York Times Food recipe for ‘Mini Almond Cakes’ which I really enjoyed but wanted to make my own recipe, and make it a little differently. I added egg yolks in addition to the usual fluffy egg white–but not before also fluffing the egg yolks with some confectioners sugar.
The cool thing about these Almond cupcakes is that they are automatically gluten-free, as they use almond meal instead of flour. They also do not use a ton of sugar and taste light, and go especially well with the sweeter fruit jam on the top. Enjoy!

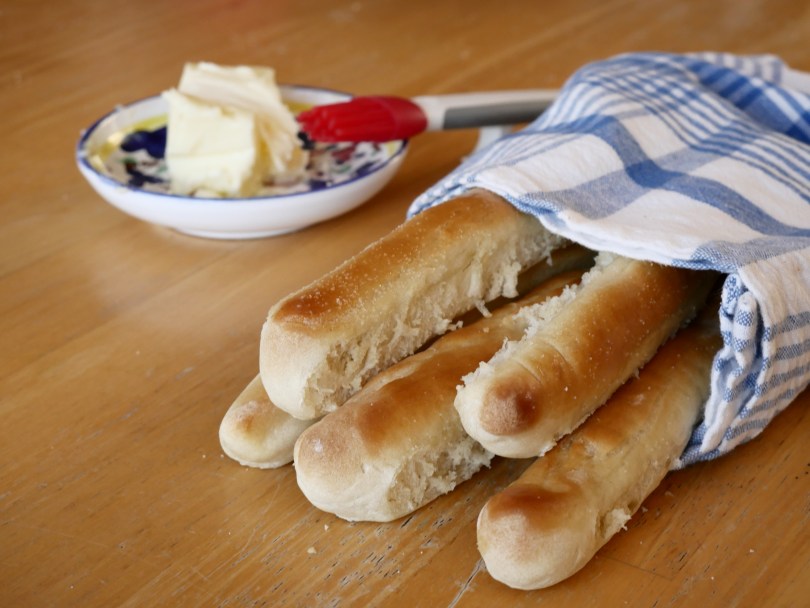
These flavorful breadsticks were made to copy the ones made at Olive Garden, and can be made in just over 90 minutes.
Spread the hot breadsticks with melted butter, and season with a bit of garlic powder to finish it off.

Ingredients:
1 ¼ cups warm water
2 ½ teaspoons active dry yeast
2 Tablespoons sugar
3 ¼ cups flour, divided
2 tablespoons olive oil
1 ½ teaspoons salt
2 tablespoons melted butter
Sprinkling of garlic powder
DIRECTIONS:
In a small bowl, put in the warm water, yeast, and sugar, to proof the yeast. Let sit for 5 minutes, or until foamy.
In the bowl of a stand mixer, mix 2 cups of the flour and salt briefly to combine. Add in the yeast mixture, and stir till all combined. Begin to gradually pour in the remaining 1 ¼ cups of flour until stretchy and smooth looking. Add in the 2 tablespoons of oil and continue to knead with the knead attachment in the bowl mixer. If the mixture is too wet and sticky, add in more flour.
Once dough is the right consistency, take dough out of bowl, spray bowl with nonstick spray, and put the dough back into the bowl. Cover the bowl and let the dough rise for an hour, until doubled in size.
When done rising, cut dough into 12 equal sized pieces, and roll each piece into long breadstick-shaped logs. Place on a greased baking sheet, and let rise for another 20 minutes in a warm place. While rising, preheat oven to 425.
When rise time is done, place the breadsticks in the oven, and bake for 10-12 minutes, or until golden brown.
Once out of the oven, brush the breadsticks with the melted butter, and lightly sprinkle with garlic powder.

Chow Mein is a great make-ahead-of-time lunch. This recipe uses normal spaghetti noodles, which are easy to find and cook.
![]()
INGREDIENTS:
1/2 a head of cabbage, shredded
2/3 cup of soy sauce
1 (16 oz) pkg. of spaghetti noodles
1 Tbs. Brown Sugar
1 medium sweet onion
3 cloves of garlic
4 carrots, peeled and grate
2 tsp. chopped fresh ginger root
DIRECTIONS:
First, peel the ginger root to get skin off. Then chop into small chunks.
Then peel garlic cloves (in picture, note I used a silicone sleeve thingy to peel the garlic cloves, it works really well), and chop into medium chunks, too.
Place Ginger, Garlic, Soy Sauce, and brown sugar into wet-ingredient blender. (you can use a blender, or whatever else works, too.) Blend for 20 seconds, or until everything is finely chopped up.
NOTE: To make things much easier, you could possibly buy cabbage already shredded, and carrots, already shredded, but I just did it manually:
Peel all the carrots with a vegetable peeler, and cut the ends off. Shred with a food processor shredder attachment.
Next, peel outer leaves off cabbage for sanitary reasons, and cut half (the half you’ll be using) into small chunks, small enough to fit in the processor’s chute. If you prefer to chop the cabbage, then do it.
If not, use the easier way: the food processor. With the blade attachment, shred cabbage, and place into a bowl for keeps until you need it.
For onions: Cut onions into inch long thin segments.
Bring a large pot of water to a boil. Break your raw noodles in half before placing them in the boiling water. Cook for the time indicated on the back of your package. (9 min, average).
WHILE your noodles are boiling, pour two tablespoons of olive oil into a large skillet over medium heat.
When heated up, Put carrots and onions in, stirring, until cooked mostly, about 3 minutes. Then place cabbage in, and stir for one or so minutes. Remove from heat–but be sure it’s warm for when you want to use it.
When noodles are done cooking (you’ll know if they are tender when bitten) then take them out, and pour into a colander in an empty sink to drain. Pour into large serving bowl.
Finally, pour soy sauce mixture into Vegetables, and stir until combined. Then pour the whole vegetable thing into the prepared noodles, mixing until combined. If you wish, you may pour more soy sauce in for more flavor.
See my original post of this recipe on instructables


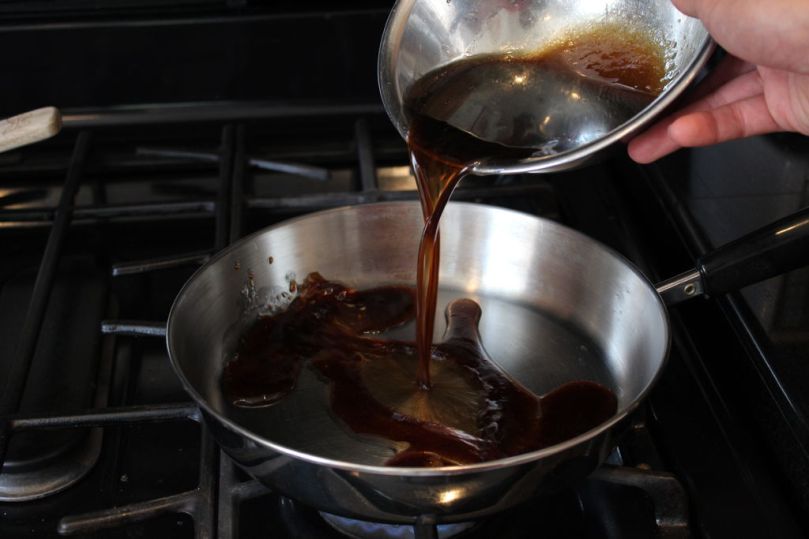
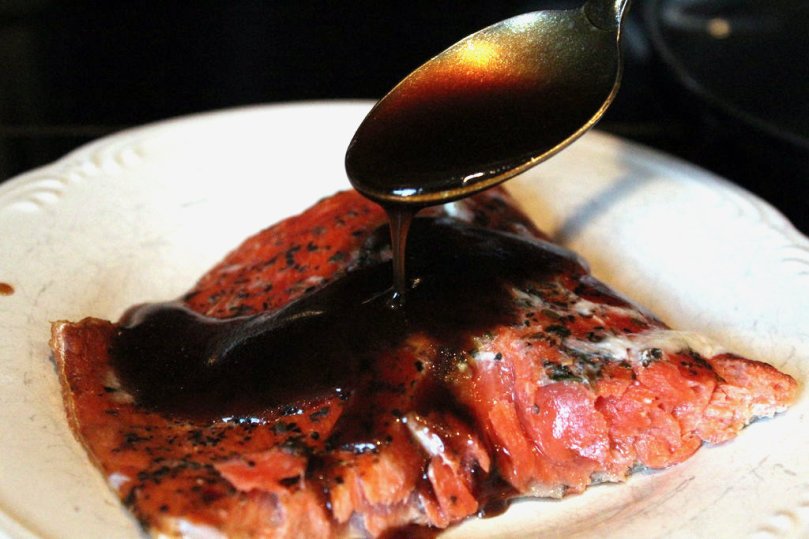
This Sweet & Thick Teriyaki Sauce is a great Asian sauce that works with almost any Asian food.
It works well as a baste for grilling things, and even a marinade.
It also works good on fish, making a plain fish (like mahi-mahi or salmon) more flavorful.
INGREDIENTS:
⅓ cup soy sauce
⅓ cup water
⅓ cup brown sugar
¼ cup avocado oil
1 tablespoon white wine vinegar
1 tablespoon cornstarch
DIRECTIONS:
In a small bowl, thoroughly mix all ingredients (except for cornstarch) together.
Pour mixture into a medium/small skillet over medium heat, and bring to a boil.
Put cornstarch into a small bowl. Pour a bit of the boiling mixture into the cornstarch bowl, and mix until homogeneous.
Pour the resulting substance back into the skillet, and stir until all combined. Boil a bit more, and then turn to low, and continue to cook, while stirring until the mixture becomes thick like syrup.
Remove from heat and use as a baste, and/or a sauce for your fish (salmon, mahi-mahi, etc.)