Butternut Squash Soup – RV cooking

Living in an RV doesn’t mean that you can’t cook meals for yourself and your family. It just means you must make do with conventions – for this reason, high-speed blenders, instant pots, and crock-pots are the kitchen tools of choice for preparing meals in a limited space. The same goes for my family and I; six people in a small RV makes meal prep slightly different than those in houses with full sized kitchens.

In this recipe, for example, we’ll be making an extremely easy and quick to make soup with butternut squash, onions, garlic, and a few other healthy and basic ingredients. The soup will be piping hot and silky smooth, and all we’ll be using is a pan to saute and boil, and a Vitamix for pulsing everything into a smooth concoction.

Read More »

Hot Cross Buns recipe

Hot Cross Buns are sweet bread rolls, traditionally made for Easter, and have icing drizzled in the form of a cross. The bread is moist with a hint of cinnamon.

IMG_2067


This recipe is different from others because of the two egg yolks that are added to the dough. Make sure to save the 2 egg whites in two separate containers, though: you’ll need one for the icing, and one to spread thinly over the rolls just before baking them.

It makes around 18 rolls, but you can make them alot smaller if you want to serve them to a larger group of people. The balls of dough initially look small, but after their second rise time on the baking sheet, they should grow more than double in size, and get even larger in the oven. So don’t be fooled by their previously small appearance.

The ones in the picture (above) started at 1-inch balls of dough–so you can see how much larger they got.

Be sure to make these delicious rolls for your Easter celebration! And, although they are traditionally made for Easter, they make great rolls anytime of the year if you simply desist from adding the icing (WARNING: icing is a strong temptation). Remove the icing cross, and you have made these into multi-purpose baked goods.

Enjoy!


Hot Cross Buns Recipe                                                                Print

hot cross buns recipe card


IMG_2071

Rich Chocolate Fudge

This chocolate fudge is a perfect homemade dessert to serve at parties or other large gatherings. Half the recipe and have enough for the whole family!

chocolate-fudge-main


INGREDIENTS:

chocolate-fudge-ingredients

INGREDIENTS:

1 7oz jar marshmallow creme

1 cup butter

3 (12oz) packages chocolate chips

2 teaspoons vanilla

4 1/2 cups sugar

1 (12 fl oz) can evaporated milk

1 cup walnuts (optional)


DIRECTIONS:

Finely chop walnuts.

Throw chopped walnuts, chocolate chips, butter, marshmallow creme, and vanilla in bowl. If butter is unsalted, sprinkle in some salt.

Combine evaporated milk and sugar in a large saucepan, and bring to a boil, constantly stirring.

Once it has reached boiling, continue in the boiling stage for 15 minutes, constantly stirring.

Pour boiling sugar mixture into all the other ingredients in the large bowl.

Stir it all with a spatula until completely homogeneous.

Spread evenly onto a 9×13 glass baking dish.

Place in the fridge and cool for at least 4 hours before serving.

Consume moderately. Recipe not meant for small family. Share with friends and family as homemade gifts, or serve at parties or other gatherings.

For step-by-step instructions with pictures, visit my original post of this recipe on instructables

Chocolate Cake with Ganache Frosting

Finally, JUST a chocolate cake. A rich, plain old chocolate cake, using many of the same ingredients and techniques that are used in my instructables Raspberry Chocolate Cake and Harry Potter’s Birthday Cake

chocolate-cake-main

I learned a lot from Jen Wold’s Cake Decorating Class on Instructables, and really recommend it to any beginner cake makers (like me) who like to make cake, and want to learn how.

Ingredients:

(For Cake Batter, Makes three 6-inch round cakes)

1 ¾ cups all-purpose flour

½ cup chocolate chips

¼ cup cocoa powder

½ cup coffee, hot

1 ¾ cup sugar

1 teaspoon salt

2 teaspoons vanilla extract

1 ¾ teaspoons baking soda

4 large eggs + 2 egg yolks

½ cup oil

1 cup buttermilk

¼ cup butter, softened


(For Frosting)

1 ⅓ cup chocolate chips (a bit more than 8 oz of baking chocolate)

⅔ cup heavy cream

4 tablespoons butter

1 teaspoon vanilla extract

¼ cup sugar

1 teaspoon corn syrup


DIRECTIONS:

Butter and flour three 6-inch cake pans, and preheat oven to 350 degrees.

If you only have two 6-inch cake pans, don’t worry. You can bake two cakes, then take them out, and use the same one to bake in again, with the reserved batter.

Over a saucepan filled a bit with simmering water, in a medium bowl, pour the hot coffee. Stir in chocolate chips and cocoa powder, and stir until chocolate is melted. Stir ½ cup of sugar until it is creamy and dissolved, a couple minutes. Mix oil in well. Remove from heat and set aside.

In a medium bowl, combine flour, salt, and baking soda.

To substitute buttermilk, if you don’t have it: in a measuring cup, add 1 tablespoon of vinegar. Fill the rest of the cup up with milk and let sit for a few minutes. Combine this, or buttermilk, in a medium bowl with vanilla.

In a stand mixer, whip all the eggs, and the remaining 1 ¼ cup of sugar on high for a few minutes, until fluffy and light. Stir in the chocolate mixture and softened butter until completely combined.

Add a bit of the flour mixture, and a bit of the buttermilk mixture alternately into the sugar mixture in the stand mixture, starting and ending with the flour mixture. Stir until combined, no more, no less.

Pour the batter in equal shares into the prepared cake pans, (if you only have two 6-inch pans, then pour 2/3 of the batter into the two of them, and reserve the other third for when the next pan is out of the oven).

Bake in preheated oven for at least 25 minutes, checking to see if done after 25 minute period. Doneness is reached when toothpick inserted in the middle comes out with only a few crumbs.

If you only had two 6-inch cake pans, now’s the time to bake that other cake real quick, and you’re done with the cakes!

When done, flip cakes over, still in their pans onto cooling rack, peel off the parchment paper. Then flip right side up on the racks and let cool completely before frosting, a couple hours. Then with a large serrated knife, level the tops of the cakes off, so you have a nice even surface, and a nice even cake, and not the Leaning Tower of Pisa.

Heat heavy cream and butter in saucepan on medium heat until it just begins to boil. Make sure butter is melted. Return heat to low, and stir in corn syrup, and sugar, until sugar is dissolved. Add vanilla.

Pour hot mixture over chocolate chips in a medium metal bowl, and stir until chocolate is melted. Place chocolate mixture in bowl in a ice bath, and stir until frosting hardens a bit. Take out of ice bath and whip with a beater until it is light and fluffy.

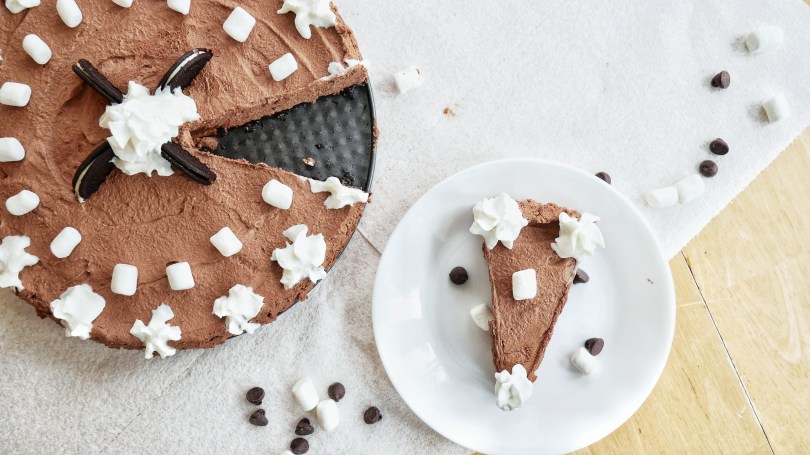
Now’s the time to ‘decorate’ the cake, or just frost it. As I mentioned before, there is a great class on Instructables making a great cake, particularly the decorating. See that class here.

It was a really helpful class, and here’s my own instructions on how to ice the cake:

If you haven’t yet, level the rounded tops of the cake layers so that they are flat, with a knife.

Start with the first layer of cake.

Put some of the frosting on top of the center. With your knife angled outwards, turn the cake platter, and push the frosting gradually out, until there is a smooth circle of frosting on the top of the cake.

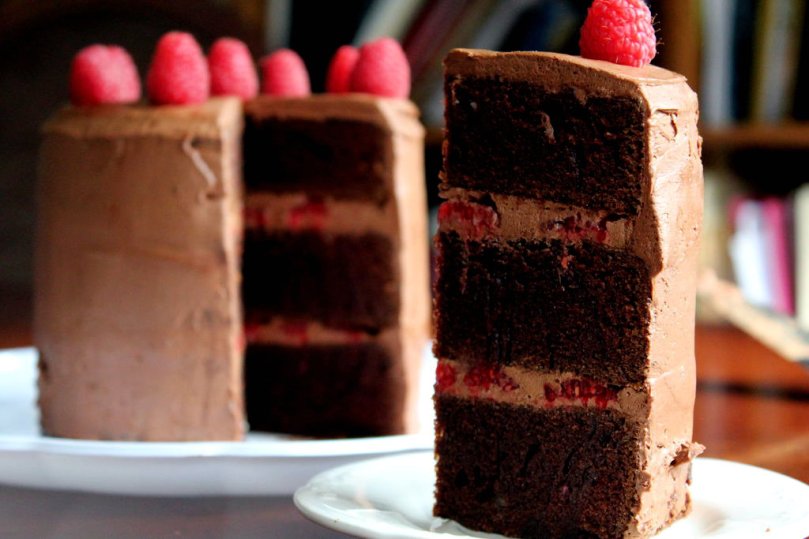
If you want to, as I did, you can smash some fruit like strawberries, or raspberries in between layers, as in picture.

Place the second layer on top of it. Repeat the process as described above.

Then put on the last layer of cake. Then ice the rest of the cake, sides, and top, making sure to reserve a good bit of icing for going over the cake again. The first layer you just put on is the ‘crumb’ layer, and after cooling it in the fridge for 20 minutes or so, you should have a nice solid cake to put the last layer of ganache on.

A cake frosting knife as shown in pic is very helpful in this situation. After applying the final layer of ganache, refrigerate for another 20 + minutes, and then take out of fridge.

Now, if you want to, you can do something extra that will probably make your cake look smoother and nicer.

Run your cake knife over really really hot water for about fifteen seconds, then quickly dry it with a paper towel, and run the hot knife smoothly over the cold ganache. Repeat this a few times until you have a smooth frosting.

Store in fridge, completely plastic wrapped to keep it from drying out.

Serve.

To see full step-by-step pictures for this recipe, go to my original post on instructables.

chocolate-cake-main-2

Pumpkin Pie From Scratch

It’s time for the holidays; and Pumpkin Pie is a perfect dessert for either Thanksgiving or Christmas.

It is also as good as any pie for any special occasion. This recipe is ‘from scratch’ because I link to one of my posts explaining how to make the pumpkin puree from scratch instead of using store-bought canned pumpkin.

pumpkin-pie-main


Ingredients:

14 oz of Pumpkin Puree   (See my post on how to make pumpkin puree from scratch!)

1 (14oz) can sweetened condensed milk

2 large eggs + 1 egg yolk

1 ½ teaspoons cinnamon

½ teaspoon pumpkin spice

¼ teaspoon ground ginger

½ teaspoon ground cloves

½ teaspoon salt

1 (9-inch) unbaked pie crust


NOTE:

If you really must, then you can use 1 can of canned, pre-made, factory-processed pumpkin.


DIRECTIONS:

If you want to make your own pureed pumpkin, follow my instructions here. If not, then just buy a can of pumpkin and continue:

Set oven temperature to 425 degrees.

In a small bowl whisk together the spices and salt. In a large bowl, beat together pureed pumpkin, sweetened condensed milk, and eggs. Then dump in the spices, and stir in well.

Pour mixture into an unbaked pie crust, and bake in preheated oven for about 10 minutes. Then set oven temp to 350, and bake for another 45 minutes, or until an inserted knife comes out clean.

Remove from oven, and rest for an hour or so, then place in fridge, and cool for another 6 hours until cold.

Serve with whipped cream.

pumpkin-pie-main-2

Holiday Molasses Cookies

These Molasses Cookies are perfect out of the oven–crispy, chewy, and full of flavor. Perfect the Holidays. Use this for Molasses Cookie Ice Cream Sandwiches, in my instructables post: Molasses Cookie Ice Cream Sandwiches Have fun baking!

molasses-cookies-main

Ingredients

(makes roughly 2 1/2 dozen)

1/2 cup salted butter, melted

1/2 cup coconut oil, melted

1 pkg. instant coffee granules

1 cup sugar

1 egg

½ cup molasses

2 tsp. cinnamon

¾ tsp. salt

1 ½ tsp. baking soda

1 tsp. ground cloves

1 tsp. ground ginger

3 cups flour


DIRECTIONS:

Preheat Oven to 350 degrees Fahrenheit.

In stand mixer, whip butter and sugar together until creamy. Add egg until incorporated. Then add the Molasses.

In a separate bowl, mix together dry ingredients: cinnamon, baking soda, cloves, ginger, salt, and flour.

Pour dry ingredients into wet ingredients in the stand mixer. Mix until smooth.

Pour some white sugar into a shallow bowl. Form dough into 1 inch balls, and roll in sugar until coated.

Place sugar-coated balls on ungreased baking sheet, and bake in preheated oven (350 degrees F) for 10 minutes. Let cool on stove top for a few minutes before serving.


molasses-cookies-balls


Egg Omelettes Recipe

Omelettes make the perfect healthy breakfast, as they contain protein in the form of eggs, and nutritious fillings of your choice, wrapped inside.

Omelettes are actually not as hard to make as many think. In this post, I’ll be presenting a simple recipe and method for making omelettes.

egg-omletts

Ingredients: (serves 2)

4 eggs

Sprinkle of Salt

Sprinkle of Pepper

1 tablespoon water

1 tablespoon cold cubed butter (optional)

1/4 cup diced ham (optional)

1/4 cup shredded cheese

2 tablespoons diced bell-pepper (optional)


DIRECTIONS:

First, dice your slices of ham into thin little bits.

Then shred your cheese.

And lastly, dice the (frozen, or really cold) butter.

First, dump your eggs into a medium sized bowl. Sprinkle in the salt and pepper, and pour in the tablespoon of water.

Melt butter over medium heat on a nonstick pan.

Beat your eggs thoroughly, about 10 seconds.

Add the cubed butter to the egg mixture, and whip for another 15 seconds on high.

Pour the egg butter mixture into the heated pan, and let it spread across the pan, and cook for 10 seconds.

Then push a bit of the side of the circle towards the center, and let raw mixture fill it’s place. Use a nonstick spatula for this.

Keep going around the circumference of the egg mixture in the pan, pushing towards the center, and letting the uncooked egg slid into its place. Soon you’ll have a mostly cooked circle of egg.

Sprinkle the ham, shredded cheese, and optional bell pepper over one half of the egg circle.

Carefully fold the unfilled layer over your fillings, as shown.

Grasp the handle of the skillet, and flip the omelette out onto a plate to serve.

Serve fresh and warm.

For step by step pictures, see my original recipe post on instructables.

omelettes-filling
Sprinkle on the filling.

RECIPE REVIEW: Pumpkin Bread from “Once Upon a Chef”

Instead of posting one of my own recipes, I decided to review a recipe from another food blog; so this post is a Recipe Review from the food website: ‘Once Upon a Chef’, with its recipe for Pumpkin Bread.

SUMMARY:

First, I made this pumpkin bread, and it was a very good pumpkin bread. I would recommend you make it. It is a quick, easy, and pleasing recipe for fall, and if you don’t want to used the canned pumpkin, just buy a sugar pumpkin, and see my instructions on how to make pumpkin puree.

pumpkin bread main #2.jpg

METHOD:

This pumpkin bread is as quick and easy to make as cookies. It starts with the sugar and butter; then the eggs, whipping until fluffy; then the pumpkin puree, then the dry ingredients. Then you simply pop it into the oven–the only thing being that it takes approximately 65 minutes to bake at the relatively low temperature of 325 degrees, insuring a burn-free soft bread.

Also, I really like that the recipe calls to butter and flour the bread pans (and I highly recommend it, too) because it makes the bread so much easier to come out of the pan. This goes especially for cakes, as well. It makes a lot of difference.

The pumpkin bread was very soft, with a great pumpkin flavor.

CHANGES:

The only thing I did differently was to reduce the amount of sugar (something I do with all my desserts, now). In my experience, even if you reduce the sugar by a third, you may never notice a difference at all. And, it is automatically much healthier for all that.

I used homemade pumpkin puree instead of canned pumpkin. Homemade pumpkin puree is good if you want it fresh and healthy, and canned pumpkin is good if you like saving yourself time in the kitchen.


So, overall,it was an awesome recipe, and I recommend it to anyone who likes baking and making seasonal treats; and anyone who is looking for a great pumpkin bread recipe, most of all.

Thanks for stopping by, and be sure to check out this Pumpkin Bread Recipe from Once Upon a Chef!


Homemade Pumpkin Puree

If you don’t want to use the store-bought canned pumpkin, then homemade pumpkin puree is the way to go. The only ingredient you’ll need: 1 sugar pumpkin, which equals approximately one 15 oz can of pumpkin puree.

The Sugar Pumpkin:

1-sugar-pumpkin

INGREDIENT:

1 sugar pumpkin


DIRECTIONS:

Preheat oven to 375 degrees. Cut off the stem, then cut the pumpkin in half, and scrape out all the seeds and strings, reserving them if you plan on roasting the seeds. Cut the halves again into half, so that you have four pieces of pumpkin.

Place all the quarters of the pumpkin face down on a baking sheet, cover with foil, and bake in preheated oven for about an hour and a half, until tender.

Scrape the tender meat off the rind, and place in a high speed blender, or food processor. I used a Vitamix, which works really well. Puree until completely smooth, and no chunks are found.

Now you’re ready to use this your next fall recipe! Pumpkin pie, pumpkin bread, pumpkin roll, pumpkin soup, etc….

Use 1 sugar pumpkin worth of puree PER 15oz can of pumpkin.


Quartered and scraped pumpkin

pumpkin quartered.jpg