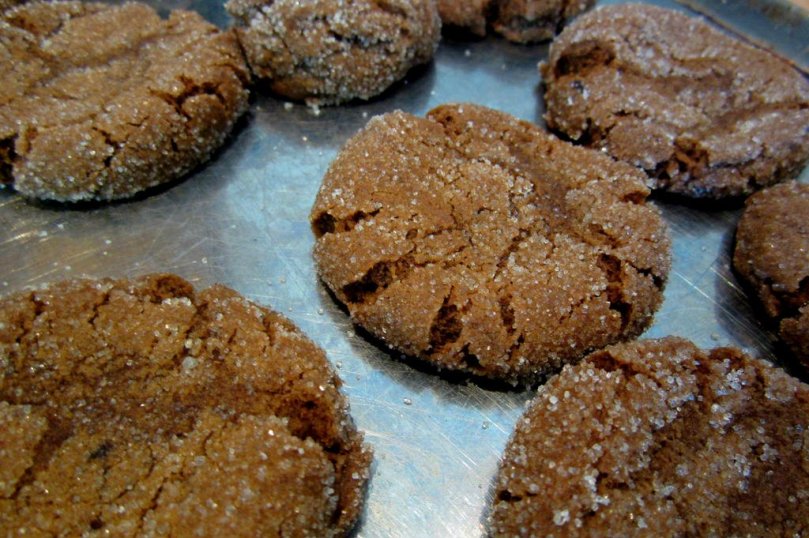
These Molasses Cookies are perfect out of the oven–crispy, chewy, and full of flavor. Perfect the Holidays. Use this for Molasses Cookie Ice Cream Sandwiches, in my instructables post: Molasses Cookie Ice Cream Sandwiches Have fun baking!
Ingredients
(makes roughly 2 1/2 dozen)
1/2 cup salted butter, melted
1/2 cup coconut oil, melted
1 pkg. instant coffee granules
1 cup sugar
1 egg
½ cup molasses
2 tsp. cinnamon
¾ tsp. salt
1 ½ tsp. baking soda
1 tsp. ground cloves
1 tsp. ground ginger
3 cups flour
DIRECTIONS:
Preheat Oven to 350 degrees Fahrenheit.
In stand mixer, whip butter and sugar together until creamy. Add egg until incorporated. Then add the Molasses.
In a separate bowl, mix together dry ingredients: cinnamon, baking soda, cloves, ginger, salt, and flour.
Pour dry ingredients into wet ingredients in the stand mixer. Mix until smooth.
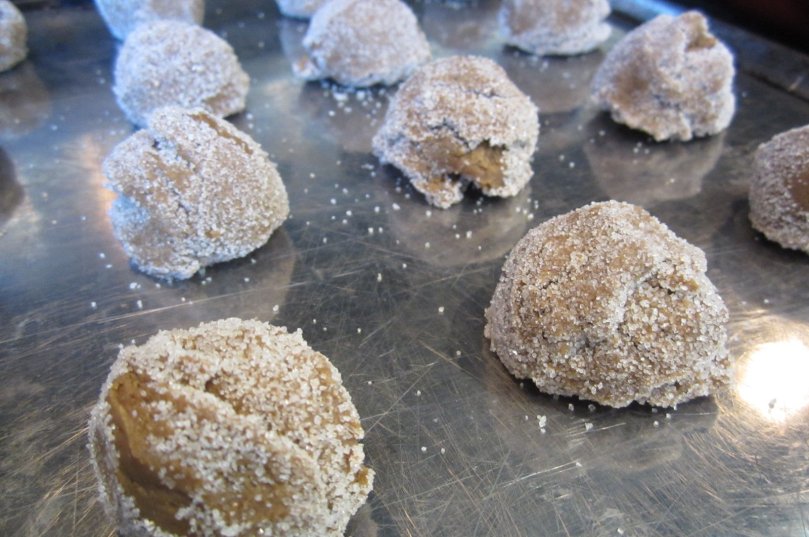
Pour some white sugar into a shallow bowl. Form dough into 1 inch balls, and roll in sugar until coated.
Place sugar-coated balls on ungreased baking sheet, and bake in preheated oven (350 degrees F) for 10 minutes. Let cool on stove top for a few minutes before serving.
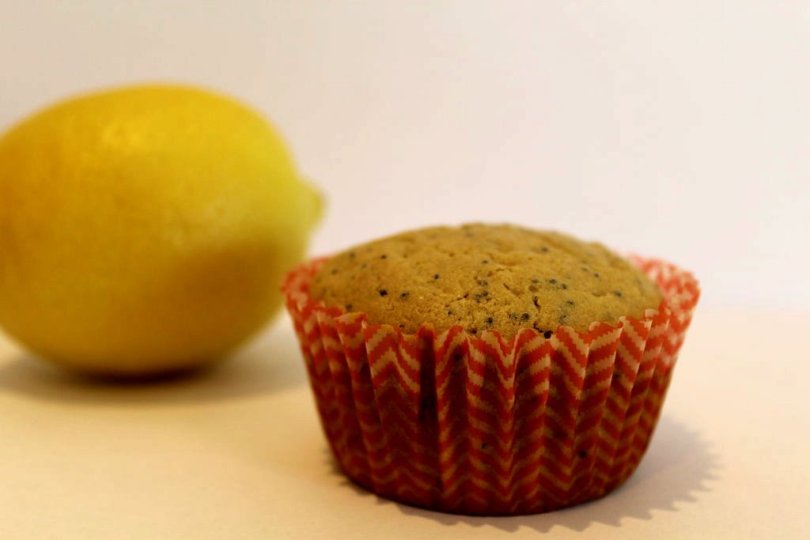
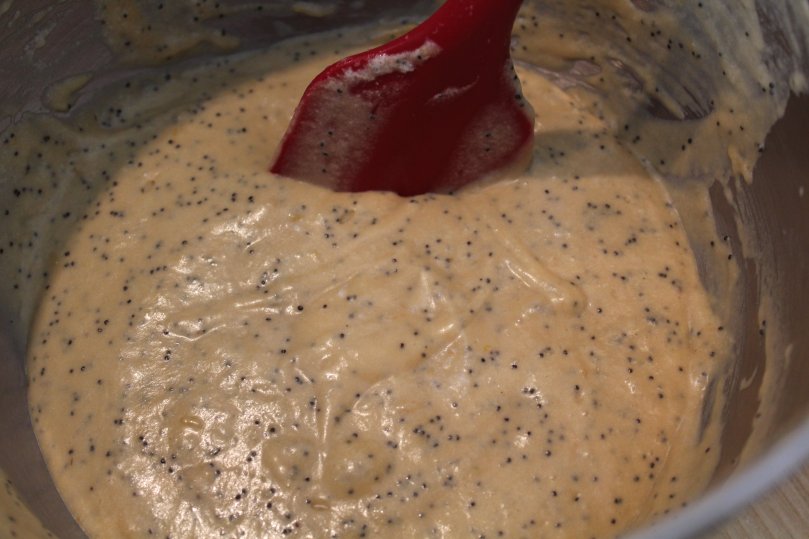
These Lemon Poppy-seed muffins are made healthy by using coconut oil instead of butter, coconut sugar instead of cane sugar, and some gluten free flour replacing some of the all-purpose flour. These make a great snack anytime of the day.
Ingredients: (makes 12 muffins)
½ cup softened coconut oil
½ cup coconut sugar
2 eggs, separated
½ cup + ⅓ cup all purpose flour
½ cup all-purpose gluten-free flour
1 teaspoon baking powder
½ teaspoon baking soda
1/4 teaspoon salt
2 tablespoons poppy-seeds
2 tablespoons lemon zest
3 tablespoons lemon juice
½ cup buttermilk (to easily make your own buttermilk, see step #_)
1 teaspoon vanilla
DIRECTIONS:
Preheat oven to 350 degrees. Grease muffin tins, or place little muffin papers in each.
(Optional but preferred: Put the lemon zest and sugar into a food processor and blend until zest is all blended in with the sugar. This is good to impart a more lemony flavor. )
In a large bowl, cream coconut oil and coconut sugar. Add eggs one at a time, until creamy and combined.
Place the egg whites separately in a medium deep bowl.
If you don’t have buttermilk, then you can easily make this substitute, that works just as well:
You’ll need 1/2 cup of buttermilk, so in a liquid measuring glass, pour in 1/2 tablespoon of vinegar. Then pour in the milk till it is filled up to 1/2 cup. Let sit for a few minutes, until curdled.
In a separate medium bowl, mix the flours, baking powder, baking soda, salt, poppy-seeds, and lemon zest. (if you already blended the lemon zest in with the sugar like I earlier suggested, then obviously, you won’t be putting it into this bowl)
Dump the flour into the sugar/oil mixture. Alternate this with pouring in the buttermilk, and lemon juice, and then vanilla, until everything is combined.
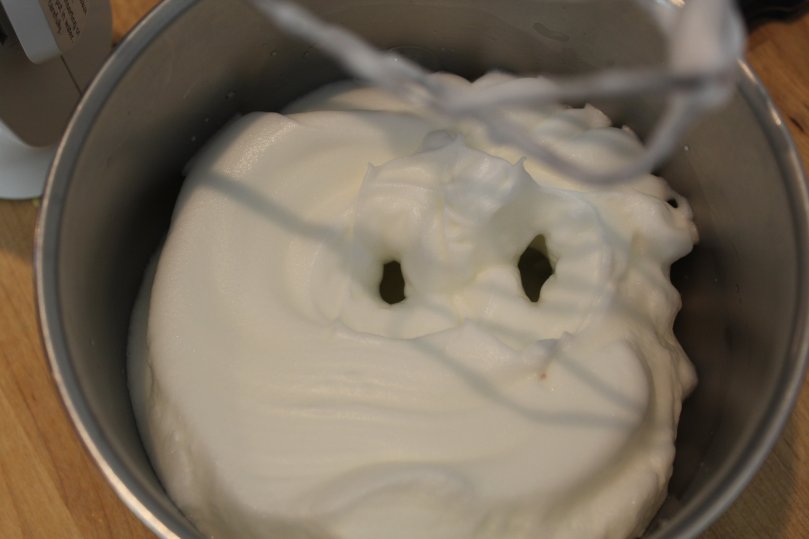
With a high-speed handmixer, whip the egg white until tall peaks form, and it is light and fluffy.
Carefully fold in the egg white into the batter until completely incorporated. Spoon evenly into the 12 muffin tins.
Bake in oven for about 25 minutes, or until golden brown.
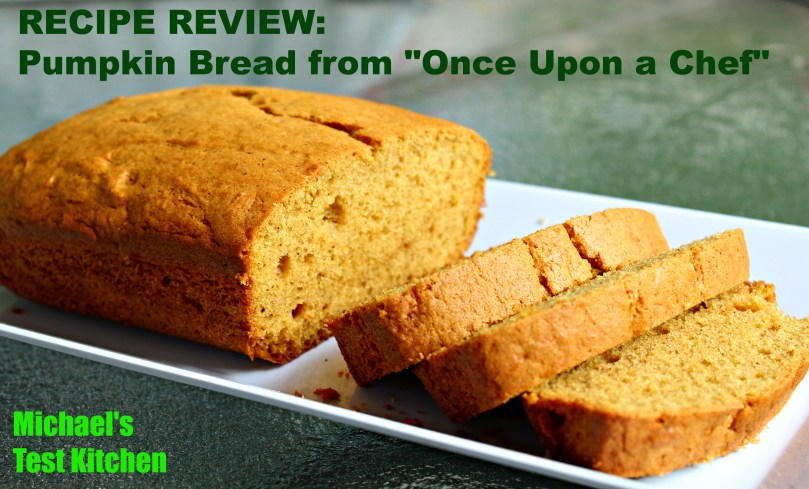
Instead of posting one of my own recipes, I decided to review a recipe from another food blog; so this post is a Recipe Review from the food website: ‘Once Upon a Chef’, with its recipe for Pumpkin Bread.
SUMMARY:
First, I made this pumpkin bread, and it was a very good pumpkin bread. I would recommend you make it. It is a quick, easy, and pleasing recipe for fall, and if you don’t want to used the canned pumpkin, just buy a sugar pumpkin, and see my instructions on how to make pumpkin puree.
METHOD:
This pumpkin bread is as quick and easy to make as cookies. It starts with the sugar and butter; then the eggs, whipping until fluffy; then the pumpkin puree, then the dry ingredients. Then you simply pop it into the oven–the only thing being that it takes approximately 65 minutes to bake at the relatively low temperature of 325 degrees, insuring a burn-free soft bread.
Also, I really like that the recipe calls to butter and flour the bread pans (and I highly recommend it, too) because it makes the bread so much easier to come out of the pan. This goes especially for cakes, as well. It makes a lot of difference.
The pumpkin bread was very soft, with a great pumpkin flavor.
CHANGES:
The only thing I did differently was to reduce the amount of sugar (something I do with all my desserts, now). In my experience, even if you reduce the sugar by a third, you may never notice a difference at all. And, it is automatically much healthier for all that.
I used homemade pumpkin puree instead of canned pumpkin. Homemade pumpkin puree is good if you want it fresh and healthy, and canned pumpkin is good if you like saving yourself time in the kitchen.
So, overall,it was an awesome recipe, and I recommend it to anyone who likes baking and making seasonal treats; and anyone who is looking for a great pumpkin bread recipe, most of all.
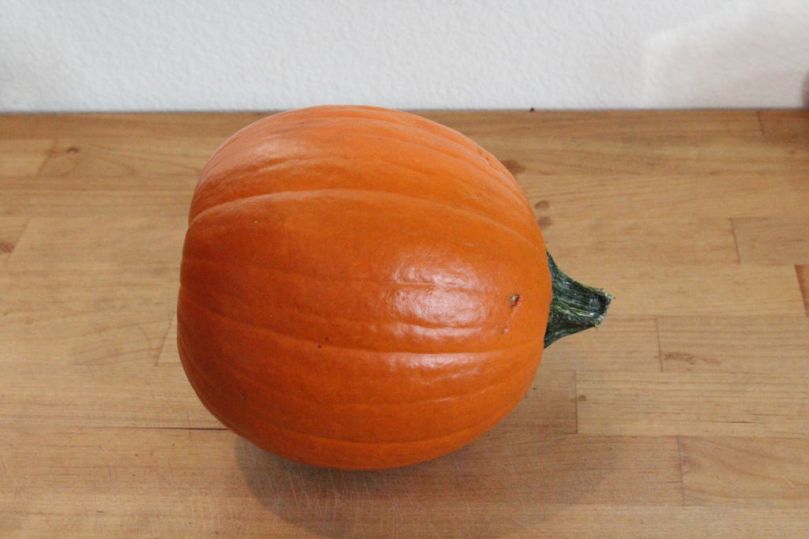
If you don’t want to use the store-bought canned pumpkin, then homemade pumpkin puree is the way to go. The only ingredient you’ll need: 1 sugar pumpkin, which equals approximately one 15 oz can of pumpkin puree.
The Sugar Pumpkin:
INGREDIENT:
1 sugar pumpkin
DIRECTIONS:
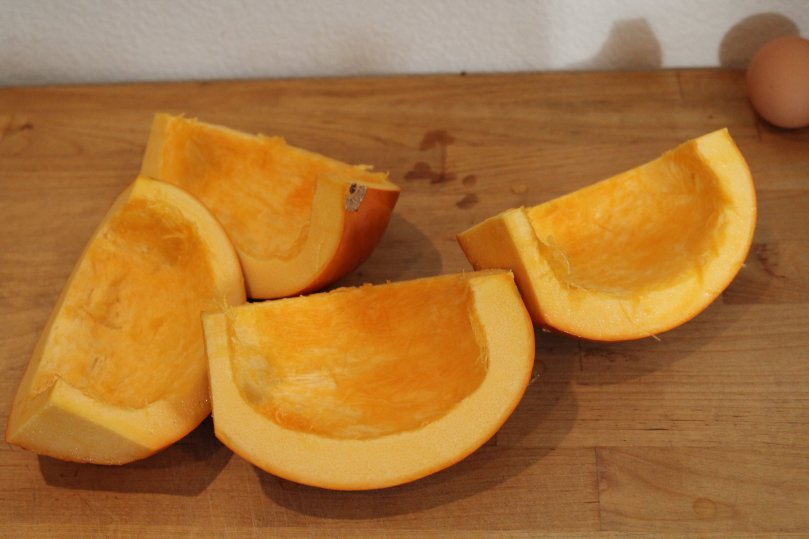
Preheat oven to 375 degrees. Cut off the stem, then cut the pumpkin in half, and scrape out all the seeds and strings, reserving them if you plan on roasting the seeds. Cut the halves again into half, so that you have four pieces of pumpkin.
Place all the quarters of the pumpkin face down on a baking sheet, cover with foil, and bake in preheated oven for about an hour and a half, until tender.
Scrape the tender meat off the rind, and place in a high speed blender, or food processor. I used a Vitamix, which works really well. Puree until completely smooth, and no chunks are found.
Now you’re ready to use this your next fall recipe! Pumpkin pie, pumpkin bread, pumpkin roll, pumpkin soup, etc….
Use 1 sugar pumpkin worth of puree PER 15oz can of pumpkin.
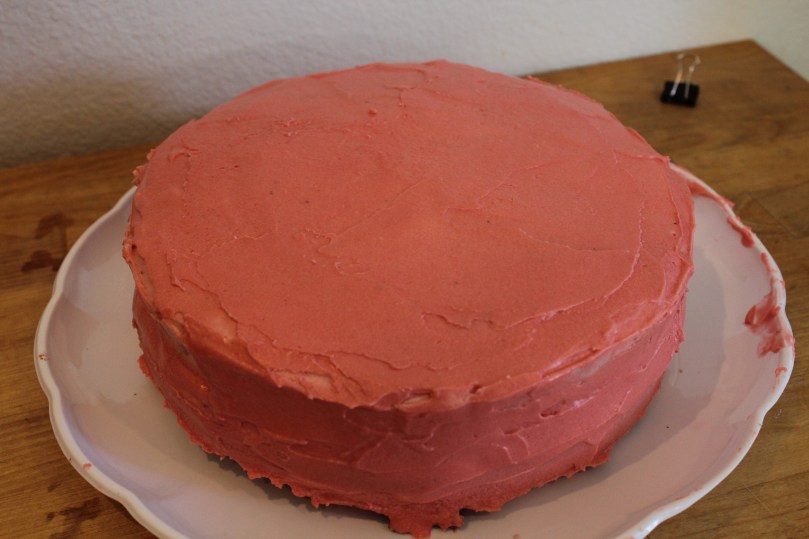
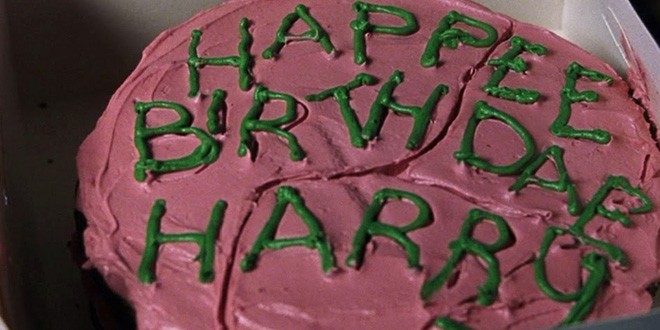
I made this cake to match the one in the movie: the one Hagrid gave Harry Potter for his birthday, in the first Harry Potter movie: The Sorcerer’s Stone.
Inside is a rich chocolate cake with chocolate frosting filling.
The top frosting is a normal buttercream frosting, died pink, and written on with green decorative icing.
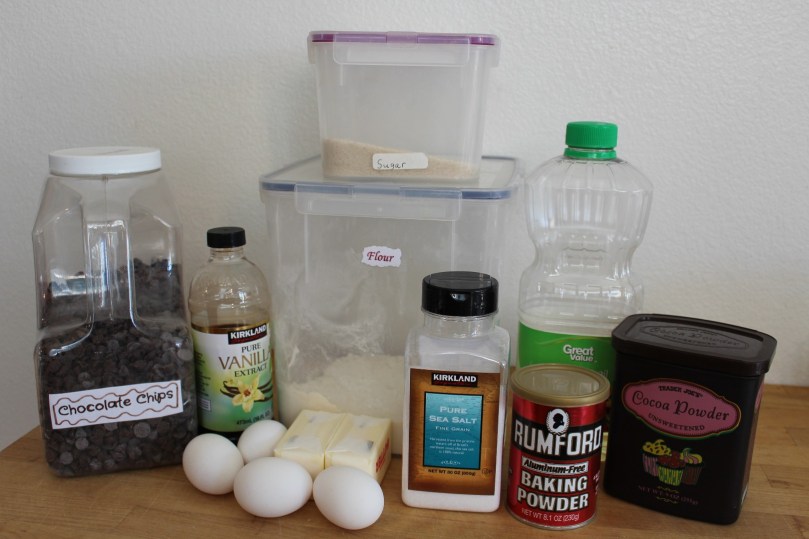
INGREDIENTS:
For Batter:
1 ¾ cups all-purpose flour
½ cup chocolate chips
¼ cup cocoa powder
½ cup coffee, hot
1 ¾ cup sugar
1 teaspoon salt
2 teaspoons vanilla extract
1 ¾ teaspoons baking soda
4 large eggs + 2 egg yolks
½ cup oil
1 cup buttermilk
¼ cup butter, softened
For Middle Frosting:
½ cup chocolate chips = 4oz baking chocolate
½ cup heavy cream
1 tablespoons butter
½ teaspoon vanilla extract
⅛ cup sugar
1 teaspoon corn syrup
For Pink Top Frosting:
¼ cup butter, softened
3 cups powdered sugar
¼ cup milk
¼ teaspoon vanilla
Red food coloring
Green Decorative Icing
DIRECTIONS:
Butter two 9 inch cake pans, then coat with flour. Tap out any excess flour.
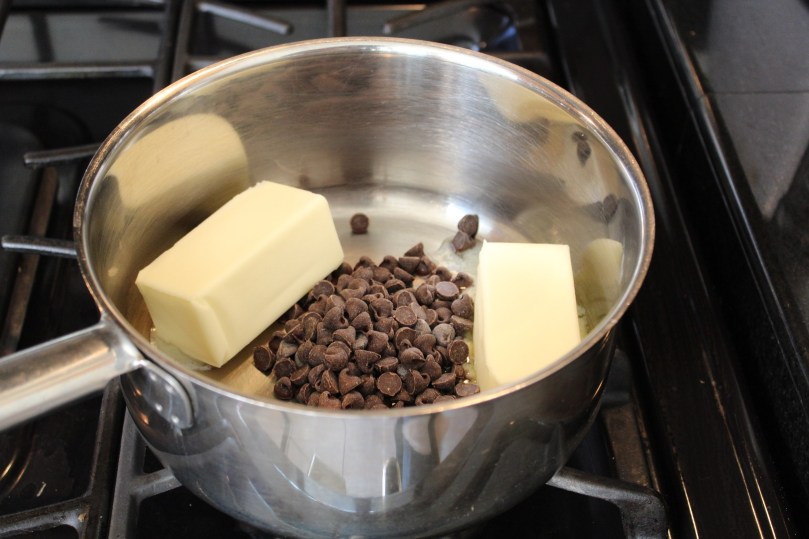
Over a saucepan filled a bit with water, in a medium bowl, pour the hot coffee. Stir in chocolate chips and cocoa powder, and stir until chocolate is melted.
Stir ½ cup of sugar until it is creamy and dissolved, a couple minutes. Mix oil in well. Remove from heat and set aside.
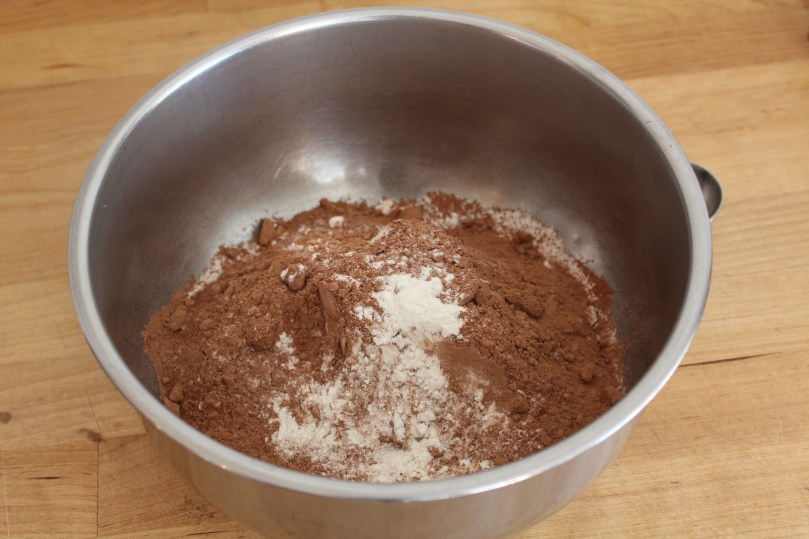
In a medium bowl, combine flour, salt, and baking soda.
(To substitute buttermilk, if you don’t have it: in a measuring cup, add 1 tablespoon of vinegar. Fill the rest of the cup up with milk and let sit for a few minutes.)
Combine buttermilk in a medium bowl with vanilla.
In a stand mixer, whip all the eggs, and the remaining 1 ¼ cup of sugar on high for a few minutes, until fluffy and light.
Now preheat the oven to 350 degrees.
Stir in the chocolate mixture and softened butter until completely combined.
Add a bit of the flour mixture, and a bit of the buttermilk mixture alternately into the sugar mixture in the stand mixture, starting and ending with the flour mixture. Stir until combined, no more, no less.
Scrape the sides, and mix a little to make sure everything is combined.
Pour the batter in equal shares into the two prepared cake pans, and bake in preheated oven for at least 25 minutes, checking to see if done after a 25 – 30 minute period.
Doneness is reached when toothpick inserted in the middle comes out with only a few crumbs.
When done, flip cakes over, still in their pans onto cooling rack, peel off the parchment paper. Then flip right side up on the racks and let cool completely before frosting, a couple hours.
Level the tops of the cakes with a knife.
Heat heavy cream and butter in saucepan on medium heat until it just begins to boil. Make sure butter is melted. Return heat to low, and stir in corn syrup, and sugar, until sugar is dissolved. Add vanilla.
Pour hot mixture over chocolate chips in a medium metal bowl, and stir until chocolate is melted.
Place chocolate mixture in bowl in a ice bath, and stir until frosting thickens and cools. Take out of ice bath and whip with a beater until it is light and fluffy.
Spread the recently whipped chocolate filling thickly onto the top of the bottom cake layer. Keep the frosting half an inch away from the sides.
Place the other half down on-top, and press firmly down. Place in fridge while you go on to the next step:
Place all Frosting Ingredients (softened butter, milk, vanilla, powdered sugar, and 3-4 drops red food coloring) into a tall small bowl, and whip until thick. I used about 3-4 drops of the red food coloring to turn it light/dark pink, but if it has not reached that shade as shown in the main picture, then you can put a few more drops in.
Spread a thin layer all around the cake first. This is called the crumb layer.
Place in the fridge at this point for twenty to thirty minutes.
Take out after duration, and coat with a thicker coating of the pink frosting.
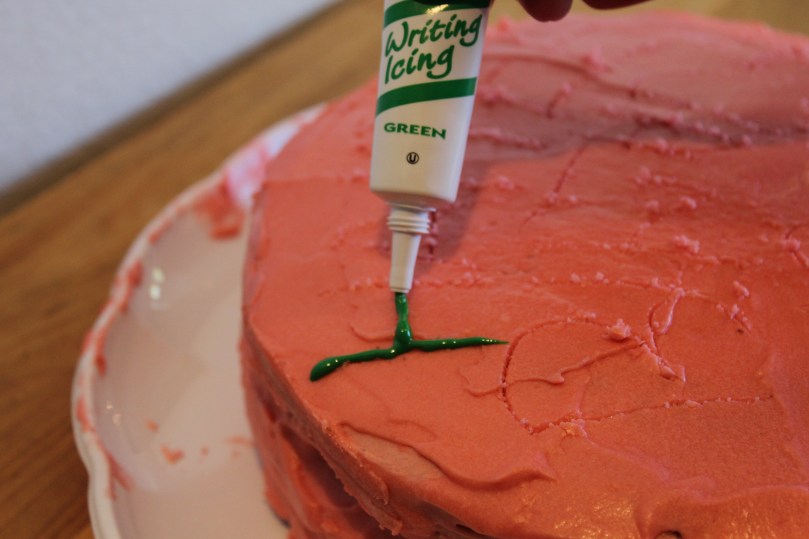
You can get a tube of green decorative icing at a grocery store easily, they just are relatively expensive.
First, with a toothpick, sketch out the letters on the cake. Then carefully tube out the green stuff, drawing “HAPPEE BIRTHDAE HARRY” on the cake like so. (see picture).
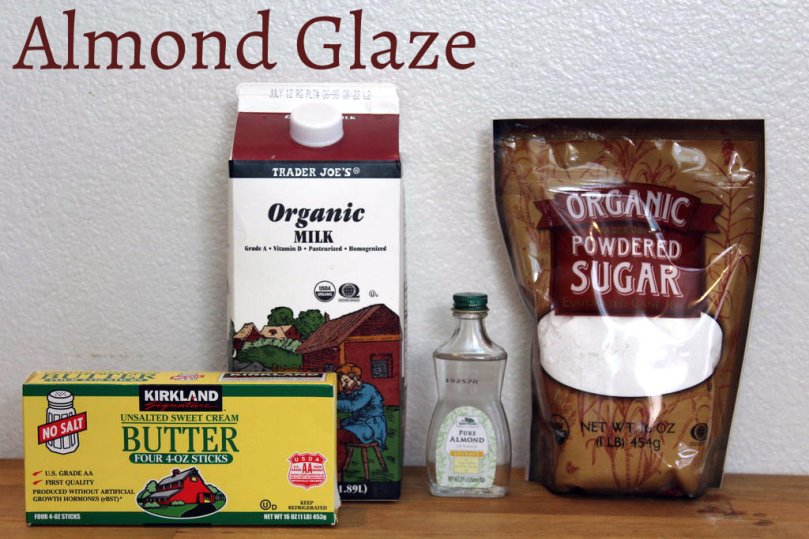
Raspberry Scones are not only a perfect treat for summer, but all year round. The raspberries should not be fresh, but rather frozen. Finish them off with a bit of complimentary Almond Glaze.
Ingredients: (makes 8 scones)
2 ½ cup flour
1 teaspoon baking soda
½ teaspoon salt
2 teaspoons cream of tartar
3 tablespoons sugar
1 cup buttermilk
¼ teaspoon almond extract
12 tablespoons unsalted butter, frozen
¾ cup frozen raspberries
For Glaze:
¾ cup powdered sugar
3 tablespoons milk
¼ teaspoon almond extract
1 tablespoon butter, melted
DIRECTIONS:
Preheat oven to 375 degrees. (If using convection, preheat At 350).
In a large bowl, quickly whisk together the flour, cream of tartar, salt, baking soda, and sugar.
In a small bowl, mix together the buttermilk, and almond extract.
With a food processor on the ‘shred’ setting (like for shredding carrots and other vegetables), shred the frozen butter.
Cut these shreds into the flour mixture in the large bowl.
Fold the sour cream mixture into the flour mixture until just combined. If it is too dry, then add 1 -2 tablespoons of milk until moist. Be careful to mix just until combined. Do not over work the dough.
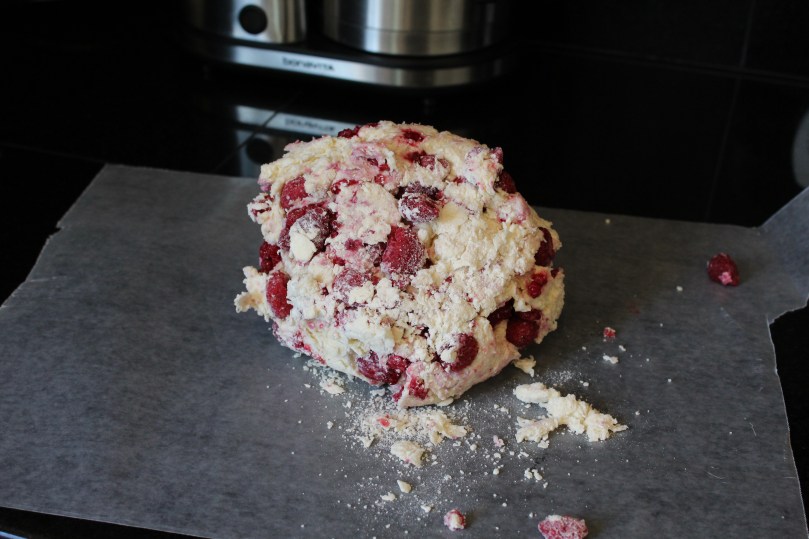
Then dump in the raspberries, and fold those in carefully. Don’t worry if the raspberries break up too much, they’ll still be fine.
Turn the resulting dough onto a piece of parchment/wax paper. Carefully shape dough into an 8-inch circle, ¾ inch thick. Be careful not to overwork the dough.
Cut out 8 pieces like you would a pie.
Place these 8 pieces onto a baking sheet, brush the tops over with some milk, and bake in preheated oven for about 15 minutes or longer, until the scones are golden.
Meanwhile, be making the almond glaze, by beating all the glaze ingredients together (powdered sugar, milk, melted butter, and almond extract).
If the consistency is too thick, add a tiny bit more milk. If it is too runny, add more powdered sugar.
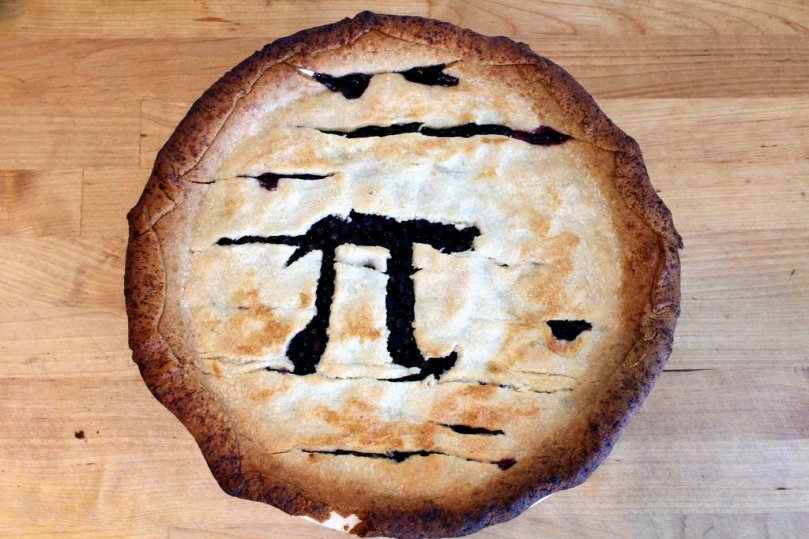
This Apple Blueberry Layer pie I made for a PI Day contest a while ago, so I engraved the Pi symbol engraved on the top of the crust. The Blueberries are layered on-top of the apples so as to show through the symbol Pi because of its great contrast to the Pie crust.
But apart from PI day, this is an very delicious twist on your everyday Apple Pie.
See recipe below:
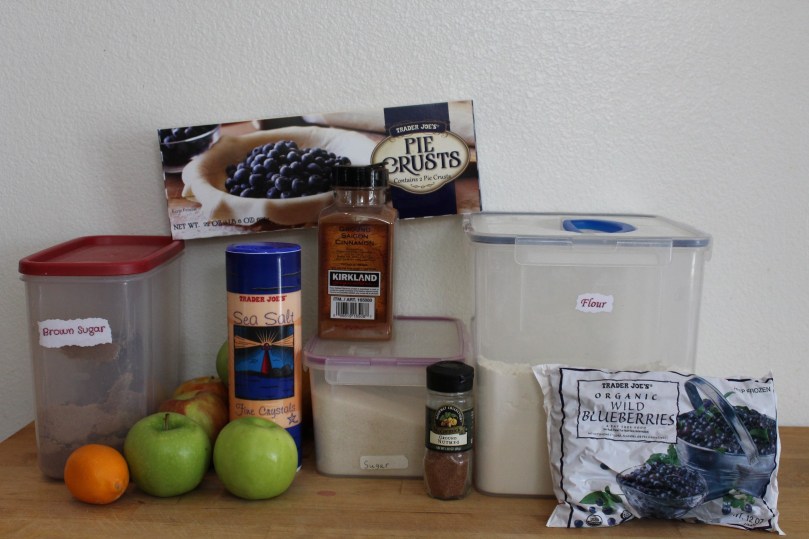
Ingredients: (makes one largish regular pie)
2 frozen pie crusts (or homemade)
2 cups of frozen blueberries
3 Granny Smith Apples
3 McIntosh Apples
2 teaspoons cinnamon
⅛ teaspoon nutmeg
½ cup sugar
¼ cup brown sugar
¼ teaspoon salt
¼ cup flour
1 tablespoon lemon juice
Sugar for garnish
1 egg white
NOTE:
It would be best to have a deep-dish pie pan for this recipe.
DIRECTIONS:
Place a room-temperature unbaked pie crust onto a pie pan, as shown. Leave the second pie crust on the counter to reach room temperature while you prepare the pie.
Combine flour, sugar, brown sugar, salt, nutmeg, and cinnamon in a small bowl.
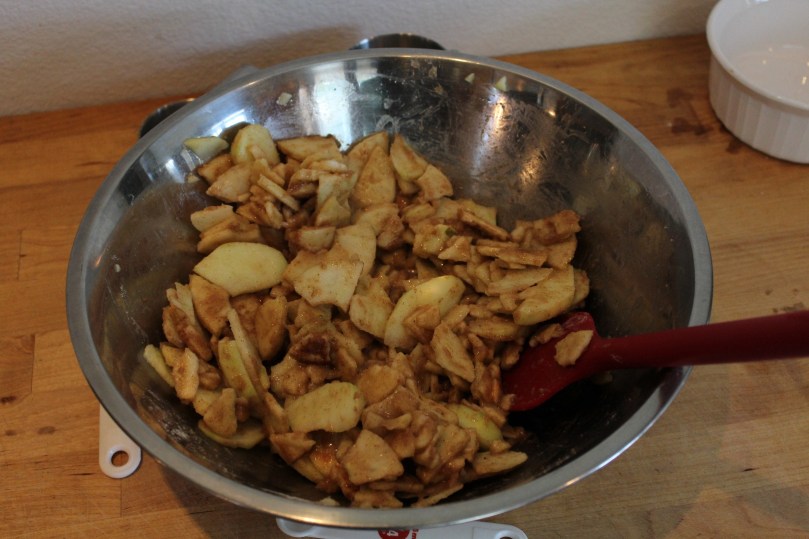
Peel, core, and slice the apples, or use a very handy machine to do it for you. Toss the ‘peeledcoredsliced’ apples and lemon juice in a large bowl. Cut large pieces with a knife until all pieces are evenly sized.
Throw the flour-spice-sugar mixture over the apples, and toss to coat the apples completely.
Throw the apple mixture into the pie crust-filled pan.
Prepare the two cups of frozen blueberries by placing them in a colander and rinse thoroughly. Pat dry with paper towels. Even if you have fresh blueberries, you could also do this to wash them.
Evenly layer these blueberries over the top of the apples.
Now you may preheat the oven to 425 degrees. (Fahrenheit)
Place the other room temperature pie crust over the top neatly, and, using a fork, press across the circumference of the pie pan, pressing the top pie crust into the bottom crust.
Optional: Using a stencil, or your own brain, carefully cut the Pi symbol (rather largely) out of the top pi crust. You can use the cut-out crust as extra decoration on the top of the pie crust if you want to.
Beat an egg white until a bit fluffy. Spread this lightly over the top of the finished pie crust. Sprinkle with a bit of sugar.
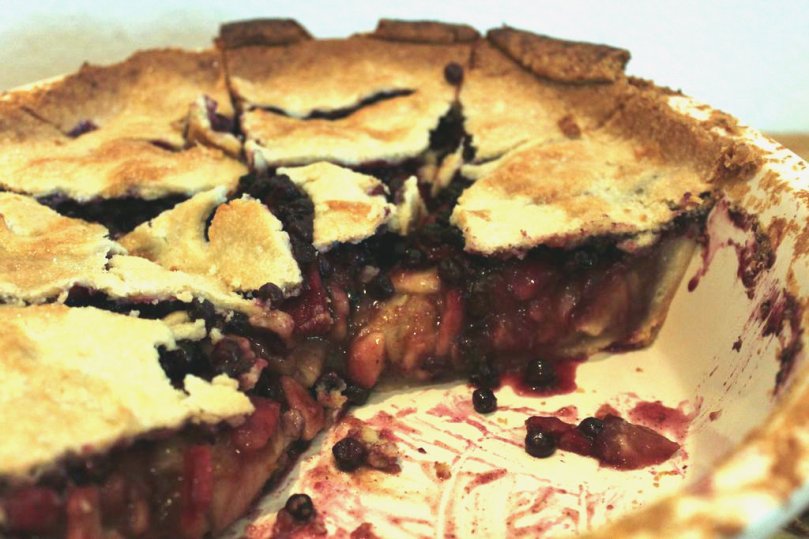
Place pie in preheated oven (425) and bake for around 40 minutes, or until crust is golden, and fruit mixture is boiling.
Remove from oven, take a nice picture, and serve. Or, as I prefer, cool in fridge completely before serving.
NOTE:
Having the pie crust defrosted completely to room temperature is important. If it is not at room temperature, it is going to be alot harder to place in the pie pan, because it will crack all over the place.
Usually with recipes, you’ll see instructions at the very beginning to preheat your oven. But with a long recipe, like this, I find it is about half an hour or so to prep, so your oven will just be wasting energy. Because of this, you’ll only need to preheat your oven in this recipe 10 – 15 minutes before you’re ready to bake. It preheats at 425 degrees. See directions.
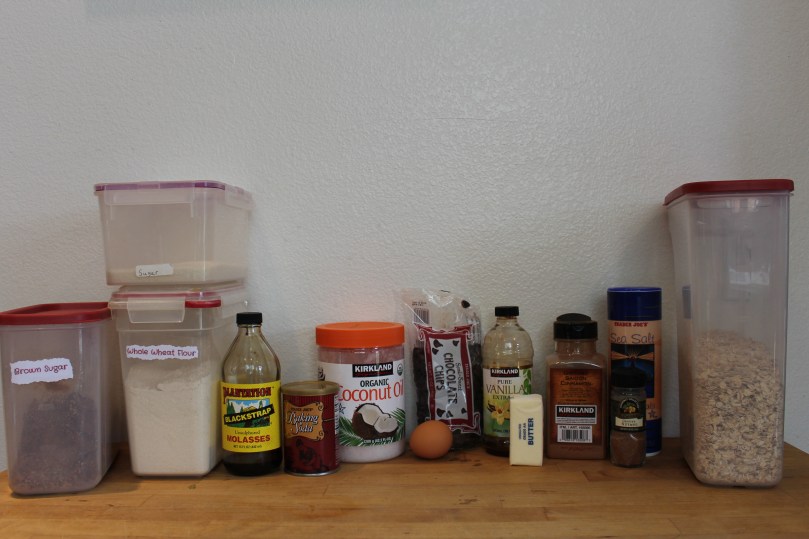
If you enjoy chocolate chip cookies, but feel guilty every time you eat one–this might be the recipe to lighten your heart and decrease your pure sugar and white gluten intake a bit.
Half the flour you’ll be using is “White Whole Wheat Flour”, a great substitute in baking for those not minding a slightly denser crumb, but not willing to go completely off gluten; let’s be honest–a completely gluten free dessert doesn’t taste quite as good.
Also, there is a bit of coconut flour for those who have it.
Of course, the rest of the flour will be all-purpose flour.
When it comes to sugar, instead of using brown cane sugar, you’ll be choosing from either coconut sugar, or turbinado sugar–or a mixture of both. A smaller amount will be white cane sugar, though.
See recipe below:
INGREDIENTS
INGREDIENTS:
1 cup all-purpose flour
1 cup white whole wheat flour
½ teaspoon baking soda
½ teaspoon salt
¾ cup butter, melted
2 tablespoons canola oil
¾ cup of coconut sugar, or turbinado sugar, or a mixture of both
⅓ cup white sugar
3 teaspoons vanilla extract
1 egg
1 egg yolk
1 ½ cups chocolate chips
DIRECTIONS:
Preheat oven to 325 degrees.
In a medium bowl, mix together flours, baking soda, and salt.
In a stand mixer, beat together sugars and melted butter until incorporated.
Put in the vanilla extract, egg, and egg yolk, and beat on high speed until light and fluffy, about 1 minute.
On low speed, gradually mix in the flour mixture, and then the chocolate chips, until everything is incorporated.
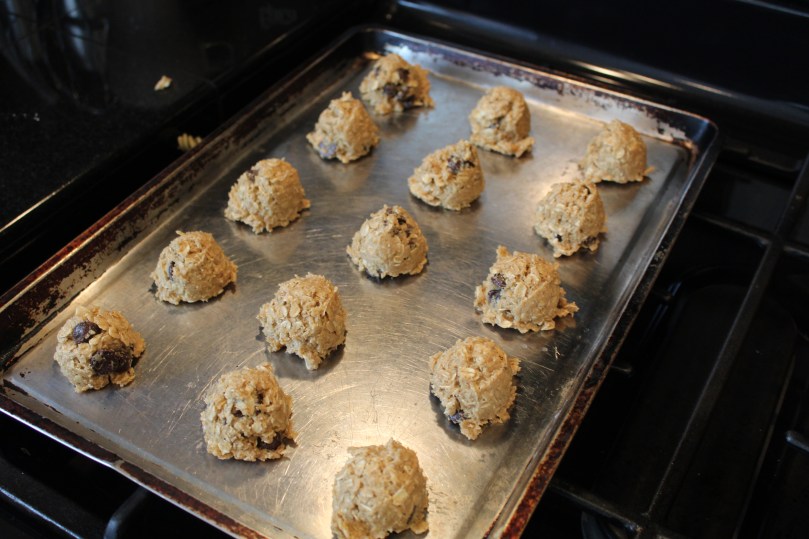
Place by tablespoons onto an ungreased baking sheet, and bake in preheated oven for 15 or more minutes, until edges are a bit browned.
Remove from oven and allow to cool for about 5-10 minutes before consuming.
These brownies have a great texture. Not too cakey and not too doughy, with chocolate chips folded in the batter, finally topped with chocolate ganache and sprinkled with M&M’s, these brownies are a perfect blend. They are also splendid for large parties or gatherings, and great for the family.
INGREDIENTS:
(for a 9×13 baking pan):
1 cup butter, melted
⅓ cup oil<\p>
2 cups sugar
4 large eggs
3 teaspoons vanilla extract
2 cups all-purpose flour
½ cup baking cocoa
½ cup melted chocolate
1 teaspoon baking powder
¾ teaspoon salt
NOTE: it is also great if you substitute a bit of sugar for brown sugar…
DIRECTIONS:
Prepare a 9×13 inch glass baking dish by placing a long piece of aluminum foil into the pan as a sling for pulling the brownies out later, and grease with cooking spray.
Preheat the oven to 350 degrees.
In a large saucepan, on low, melt butter and chocolate, stirring as it melts to prevent burning. Remove from heat after melting.
Stir in oil, eggs, sugar, and vanilla until smooth.
Mix dry ingredients (flour, baking powder, baking cocoa, and salt) in a medium bowl.
Pour into wet ingredient mixture in saucepan (off the heat) and stir until smooth and no flour streaks remain.
Optional, but more delicious: Fold about 1/2 a cup of chocolate chips into the batter.
Pour into prepared pan and bake for 25 – 30 minutes, or until toothpick inserted in the middle comes out with only a few moist crumbs, or none at all.
Cool for at least another 25 minutes.
Remove using foil sling, and place on flat working surface.
Before the icing is hardened, sprinkle M&Ms on top.
To store: place in shallow plastic containers. Do not stack brownies on top of each other.
To see all step by step pictures, go to this recipe on instructables.
…brief overview:
…melt in saucepan…
Add the rest of the wet ingredients…
Stir the dry ingredients together…
Combine the dry with the wet ingredients:
…and bake in preheated oven:
See full recipe above for all details.
If you liked this recipe, perhaps you’ll like some of my others. Check them out on the main page, or see all my recipes at my profile on instructables.
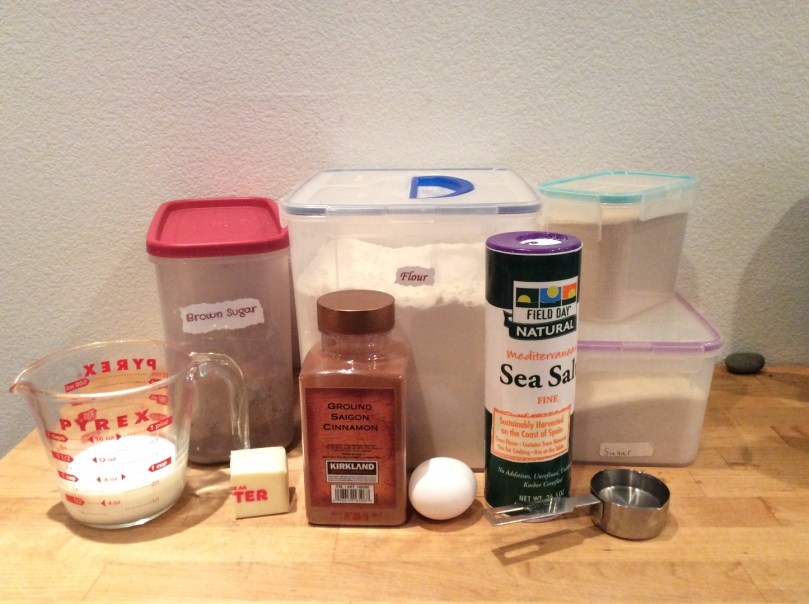
These Cinnamon Rolls are good any time of day–especially breakfast. Better still, you can make this recipe for cream cheese frosting, and slather it over the tops.
NOTE: Of course, you can substitute buttermilk with milk, and butter with margarine if you prefer.
DIRECTIONS:
Grease a 9 x 13 baking dish.
1. Place butter and buttermilk in a microwavable dish, and microwave 2 times–each time being a thirty seconds–taking the dish out and stirring in between. At the end of this process, the butter should be melted.
2. In a mixing bowl, like a kitchen aid, combine 2 cups of flour, yeast, sugar, and salt. Mix in water, egg, and buttermilk-butter mixture until combined. Remove paddle attachment and attach a dough hook, to knead the dough. Or, if you prefer to knead by hand, place dough onto thoroughly floured surface. Carefully and gradually incorporate flour until dough is stretchy and smooth. Place on a floured surface, and knead for a few minutes.
3. Grease the mixing bowl, and place dough back in, cover it with a towel, and let it rise for ten minutes. Meanwhile, combine brown sugar and cinnamon in small bowl, and make sure your butter is at room temperature. (you can put your butter in the microwave to soften it.)
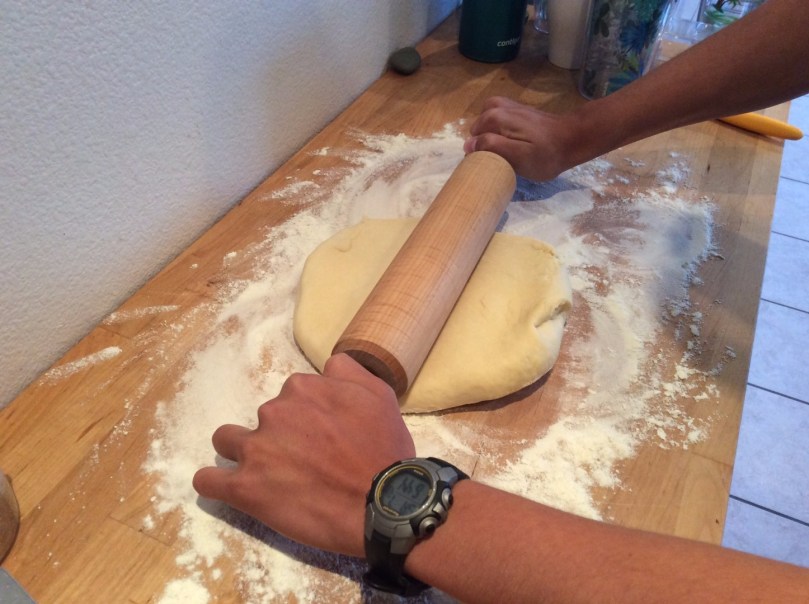
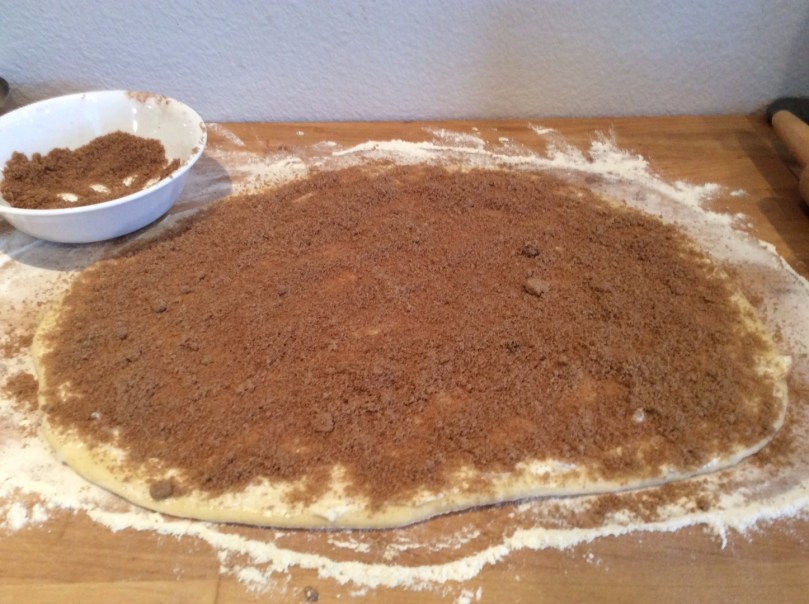
4. Turn dough out on floured surface and roll out a large rectangle, about 12×9 inches. Spread softened butter generously over the top of the rolled out dough until thick and evenly distributed. (a wide bendy plastic knife works well for this). Using your hands, sprinkle all the sugar out on the dough evenly.
5. Roll the dough up tightly into a log and pinch ends to seal. Then place cut-side up on the greased glass baking pan. Cover with a towel and let rolls rise for 30 minutes. Half way through rising period, you should preheat your oven to 375 degrees F.
6. Bake rolls in oven for 20 minutes, until golden brown, and sugar mixture in the middle is boiling. Take out of oven. When just warm, and ready to serve, drizzle cream cheese icing over individual rolls, and serve.


