If you don’t want to use the store-bought canned pumpkin, then homemade pumpkin puree is the way to go. The only ingredient you’ll need: 1 sugar pumpkin, which equals approximately one 15 oz can of pumpkin puree.
The Sugar Pumpkin:
INGREDIENT:
1 sugar pumpkin
DIRECTIONS:
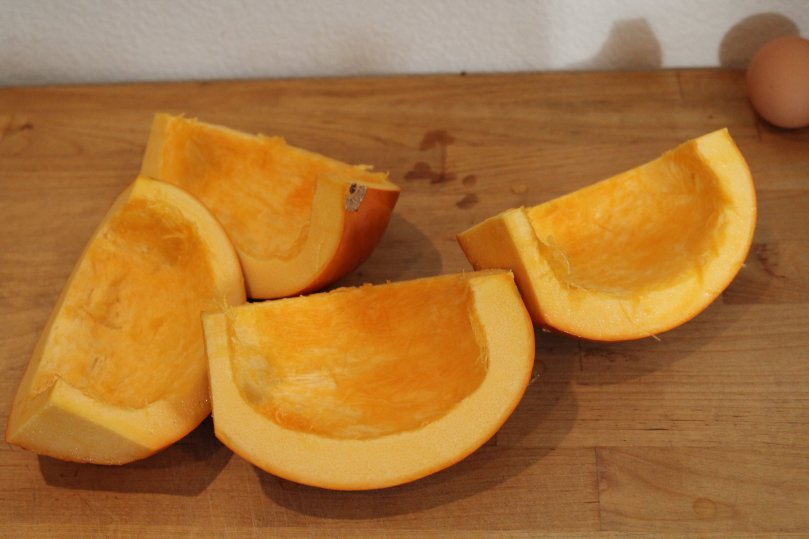
Preheat oven to 375 degrees. Cut off the stem, then cut the pumpkin in half, and scrape out all the seeds and strings, reserving them if you plan on roasting the seeds. Cut the halves again into half, so that you have four pieces of pumpkin.
Place all the quarters of the pumpkin face down on a baking sheet, cover with foil, and bake in preheated oven for about an hour and a half, until tender.
Scrape the tender meat off the rind, and place in a high speed blender, or food processor. I used a Vitamix, which works really well. Puree until completely smooth, and no chunks are found.
Now you’re ready to use this your next fall recipe! Pumpkin pie, pumpkin bread, pumpkin roll, pumpkin soup, etc….
Use 1 sugar pumpkin worth of puree PER 15oz can of pumpkin.
These waffles are very easy to make at home; they are crispy on the outside, and fluffy on the inside.
Be sure to eat while fresh and hot.
See recipe:
Ingredients
INGREDIENTS: (serves 8)
2 eggs, separated
1 cup milk
¾ cup coconut milk
1 tablespoon sugar
1 ½ cups flour
½ cup whole wheat flour
½ cup vegetable oil
4 teaspoons baking powder
¼ teaspoon salt
¼ teaspoon vanilla
DIRECTIONS:
Preheat your waffle iron according to the manufacturer’s instructions.
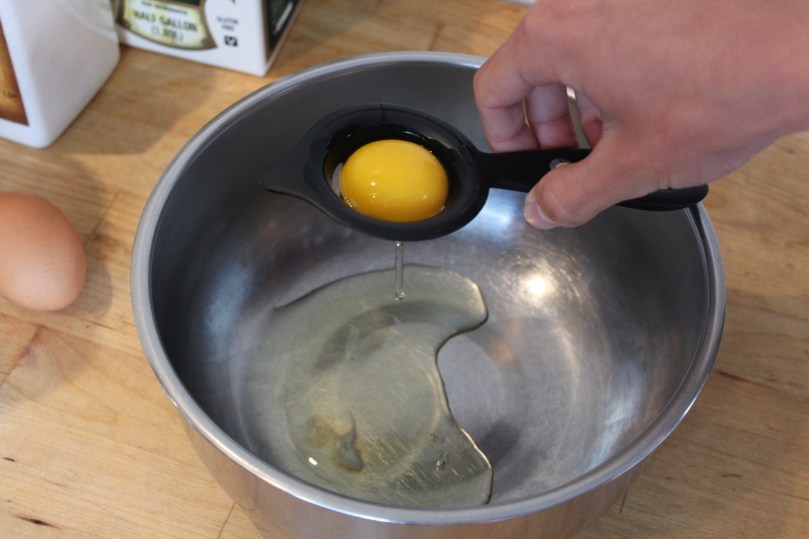
Separate the egg using an egg separator, over a large metal bowl. The egg white will go in this metal bowl, and the egg yolk will go into the blender.
In the blender, pour in the rest of the ingredients over the egg yolk, (except the egg whites): (milk, coconut milk, sugar, flour, whole wheat flour, oil, baking powder, salt, and vanilla). Pour the wet ingredients in first for easier blending. Blend until nice and combined and fluffy.
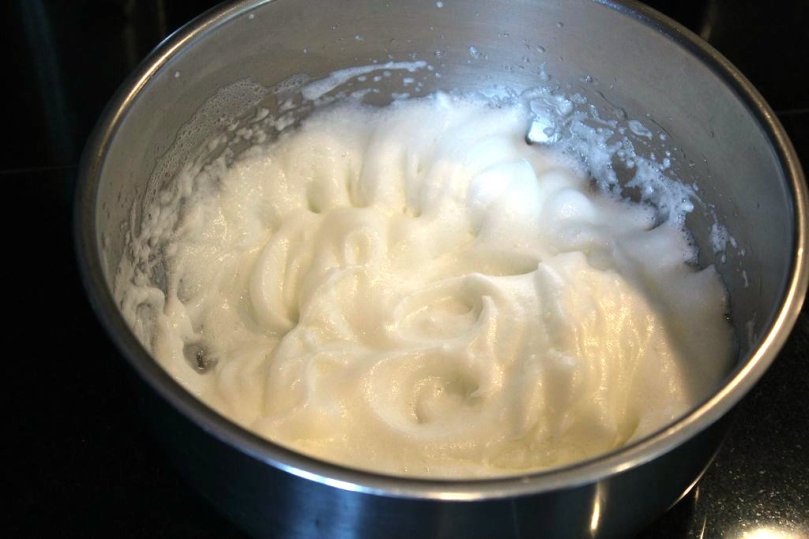
After you’ve already blended the wet ingredients (except for the egg white), go back to your large metal bowl with the two egg whites in it. Get a high speed hand mixer, and whip those egg whites for about one minute (depending how fast your whipper is), until you get soft, fluffy, white peaks.
Now, pour all the ingredients from the blender into the whipped egg white bowl. Scrape the blender to make sure you’ve got almost everything. Now, fold the egg whites into the rest of the ingredients. This is what will make your waffles nice and fluffy on the inside. Now you are ready to cook your waffles.
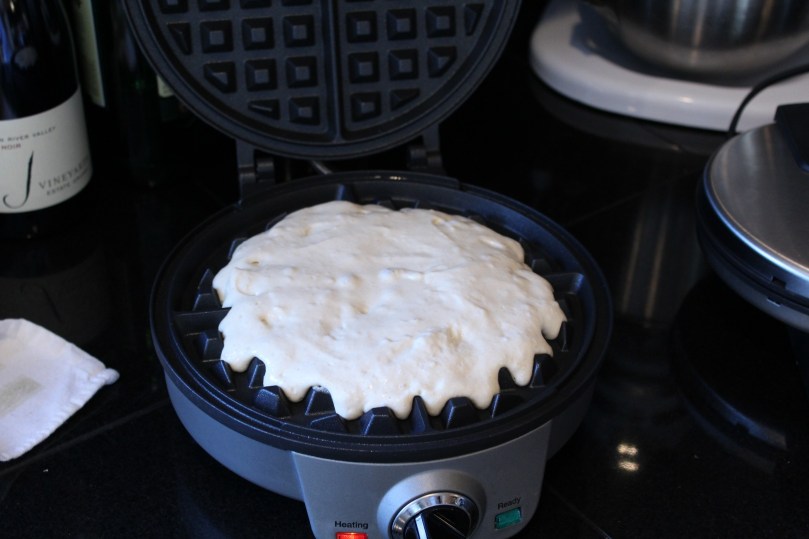
When your waffle iron is done preheating, open it up, and pour in your batter using a measuring cup. The amount of batter you’ll need depends on your waffle maker. The waffle maker will beep, and/or have a green light go on when the waffle is done cooking. But there’s not hurt in checking manually beforehand to see if the waffle is done.
Repeat this cooking process however many times it takes to finish your batter. If you will not be eating your waffles right away, but will probably eat it in 10 – 30 minutes after cooking (which is not necessarily recommended), preheat oven to 170 degrees, and line the rack with some parchment paper. Place your cooked waffles in this warm place until ready to eat.
If you do this, though, chances are that the waffles won’t be as crispy as they were right out of the waffle maker.
Serve with syrup, and/or fruit jam…
…or however you like eating waffles.
NOTE:
You can use a special egg separator like I do if you prefer that over doing it with the egg shell, which is harder. You can buy an egg separator here: At Amazon
Scroll down to see some step-by-step pictures.
RECOMMENDED WAFFLES IRON(S):
If you don’t have a waffle maker, and you are interested in buying one, see below:
I use a Cuisinart Belgian Waffle Maker, which is a really nice, large, deep waffle maker that makes great waffles, for $60.
I also use (behind the scenes) a Cuisinart Classic Waffle Maker that works perfectly fine, too, for half the price as the Belgian Waffle maker. The difference? This $30 classic waffle maker is a lot smaller, and less deep, and so it holds less waffle batter. It also doesn’t BEEP when the waffle is done cooking.
I recommend the Belgian waffle maker if you don’t mind spending the money for it.
If you’re on a budget, however, and don’t have many mouths to feed, I’d personally recommend the Classic Waffle Maker.
See the links above.
Separating the eggs…Egg whites after being whipped.Waffle batter poured.