Omelettes make the perfect healthy breakfast, as they contain protein in the form of eggs, and nutritious fillings of your choice, wrapped inside.
Omelettes are actually not as hard to make as many think. In this post, I’ll be presenting a simple recipe and method for making omelettes.
Ingredients: (serves 2)
4 eggs
Sprinkle of Salt
Sprinkle of Pepper
1 tablespoon water
1 tablespoon cold cubed butter (optional)
1/4 cup diced ham (optional)
1/4 cup shredded cheese
2 tablespoons diced bell-pepper (optional)
DIRECTIONS:
First, dice your slices of ham into thin little bits.
Then shred your cheese.
And lastly, dice the (frozen, or really cold) butter.
First, dump your eggs into a medium sized bowl. Sprinkle in the salt and pepper, and pour in the tablespoon of water.
Melt butter over medium heat on a nonstick pan.
Beat your eggs thoroughly, about 10 seconds.
Add the cubed butter to the egg mixture, and whip for another 15 seconds on high.
Pour the egg butter mixture into the heated pan, and let it spread across the pan, and cook for 10 seconds.
Then push a bit of the side of the circle towards the center, and let raw mixture fill it’s place. Use a nonstick spatula for this.
Keep going around the circumference of the egg mixture in the pan, pushing towards the center, and letting the uncooked egg slid into its place. Soon you’ll have a mostly cooked circle of egg.
Sprinkle the ham, shredded cheese, and optional bell pepper over one half of the egg circle.
Carefully fold the unfilled layer over your fillings, as shown.
Grasp the handle of the skillet, and flip the omelette out onto a plate to serve.
This sort of redefines the term ‘bacon and eggs for breakfast’. Each egg muffin is wrapped with one piece of bacon, and baked in muffin tins. This makes a perfect breakfast for any morning, and has countless variations.
The goal is to undercook the bacon so that it is still very flexible and not crispy. Preheat oven to 375. When heated, place bacon in for about 10 minutes. Take out of oven.
When bacon is cool to touch, place them (as shown) in the muffin tins. Preheat oven to 400 degrees.
Crack each egg into the bacon-wrapped tins. Sprinkle over with salt and pepper and shredded cheese.
Place in preheated 400 degree oven, and bake for a little over 15 minutes, or until eggs are fully eggs are fully cooked, and bacon is crispy.
1. Make an omelette variation on this: whip the egg with shredded cheese, half and half, and vegetables, or maybe some Feta, and cook it up the same way, wrapped in bacon, for a nice twist on breakfast.
2. For a more full-on variation: Add raw hash-browns to the bottom of the muffin tins, or some…pancake batter, and do everything else the same way.
3. Or you could always do a combination of those two. There are many many ways to change around this recipe.
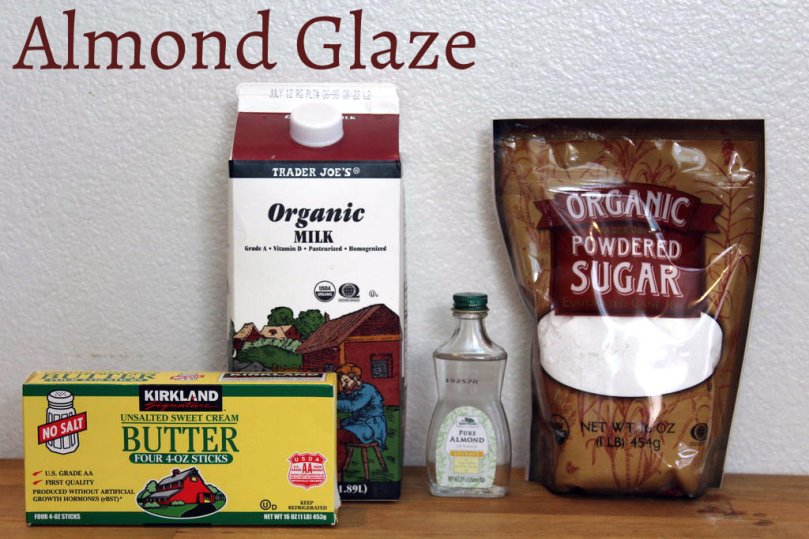
Raspberry Scones are not only a perfect treat for summer, but all year round. The raspberries should not be fresh, but rather frozen. Finish them off with a bit of complimentary Almond Glaze.
Ingredients: (makes 8 scones)
2 ½ cup flour
1 teaspoon baking soda
½ teaspoon salt
2 teaspoons cream of tartar
3 tablespoons sugar
1 cup buttermilk
¼ teaspoon almond extract
12 tablespoons unsalted butter, frozen
¾ cup frozen raspberries
For Glaze:
¾ cup powdered sugar
3 tablespoons milk
¼ teaspoon almond extract
1 tablespoon butter, melted
DIRECTIONS:
Preheat oven to 375 degrees. (If using convection, preheat At 350).
In a large bowl, quickly whisk together the flour, cream of tartar, salt, baking soda, and sugar.
In a small bowl, mix together the buttermilk, and almond extract.
With a food processor on the ‘shred’ setting (like for shredding carrots and other vegetables), shred the frozen butter.
Cut these shreds into the flour mixture in the large bowl.
Fold the sour cream mixture into the flour mixture until just combined. If it is too dry, then add 1 -2 tablespoons of milk until moist. Be careful to mix just until combined. Do not over work the dough.
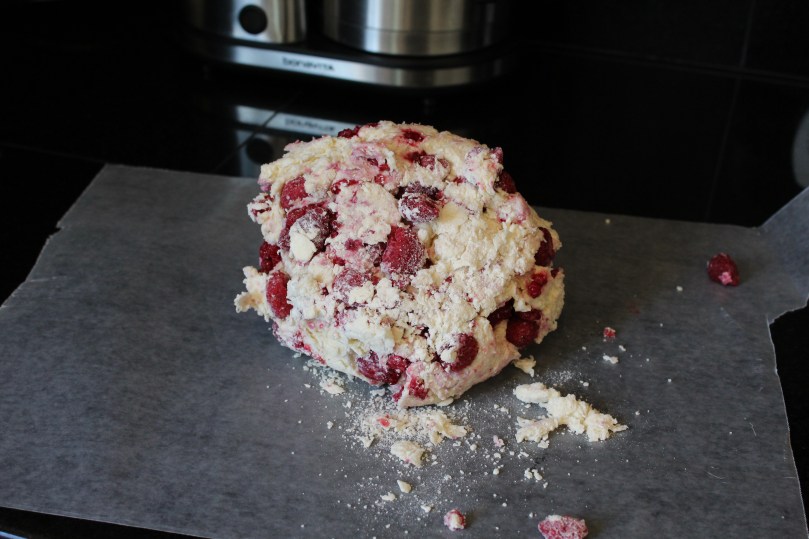
Then dump in the raspberries, and fold those in carefully. Don’t worry if the raspberries break up too much, they’ll still be fine.
Turn the resulting dough onto a piece of parchment/wax paper. Carefully shape dough into an 8-inch circle, ¾ inch thick. Be careful not to overwork the dough.
Cut out 8 pieces like you would a pie.
Place these 8 pieces onto a baking sheet, brush the tops over with some milk, and bake in preheated oven for about 15 minutes or longer, until the scones are golden.
Meanwhile, be making the almond glaze, by beating all the glaze ingredients together (powdered sugar, milk, melted butter, and almond extract).
If the consistency is too thick, add a tiny bit more milk. If it is too runny, add more powdered sugar.
These waffles are very easy to make at home; they are crispy on the outside, and fluffy on the inside.
Be sure to eat while fresh and hot.
See recipe:
Ingredients
INGREDIENTS: (serves 8)
2 eggs, separated
1 cup milk
¾ cup coconut milk
1 tablespoon sugar
1 ½ cups flour
½ cup whole wheat flour
½ cup vegetable oil
4 teaspoons baking powder
¼ teaspoon salt
¼ teaspoon vanilla
DIRECTIONS:
Preheat your waffle iron according to the manufacturer’s instructions.
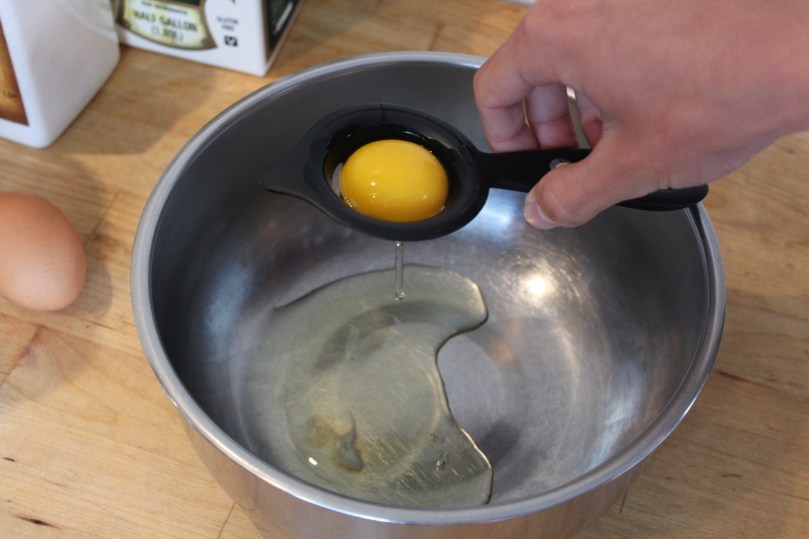
Separate the egg using an egg separator, over a large metal bowl. The egg white will go in this metal bowl, and the egg yolk will go into the blender.
In the blender, pour in the rest of the ingredients over the egg yolk, (except the egg whites): (milk, coconut milk, sugar, flour, whole wheat flour, oil, baking powder, salt, and vanilla). Pour the wet ingredients in first for easier blending. Blend until nice and combined and fluffy.
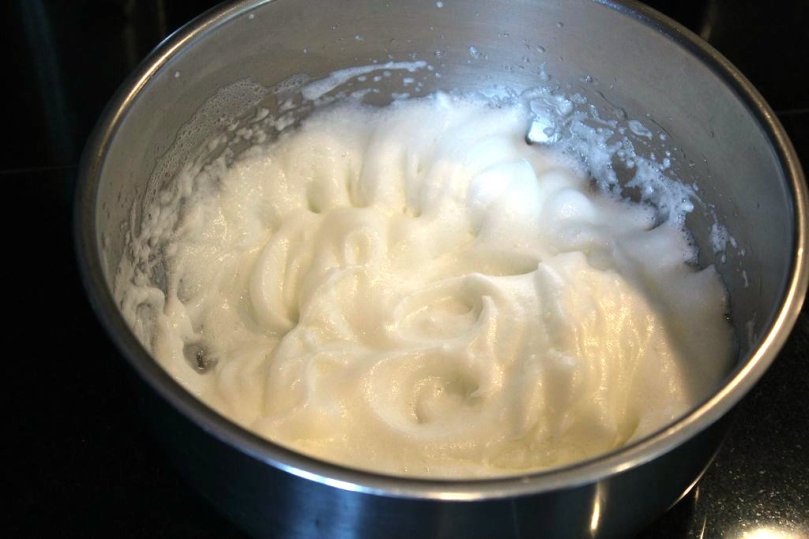
After you’ve already blended the wet ingredients (except for the egg white), go back to your large metal bowl with the two egg whites in it. Get a high speed hand mixer, and whip those egg whites for about one minute (depending how fast your whipper is), until you get soft, fluffy, white peaks.
Now, pour all the ingredients from the blender into the whipped egg white bowl. Scrape the blender to make sure you’ve got almost everything. Now, fold the egg whites into the rest of the ingredients. This is what will make your waffles nice and fluffy on the inside. Now you are ready to cook your waffles.
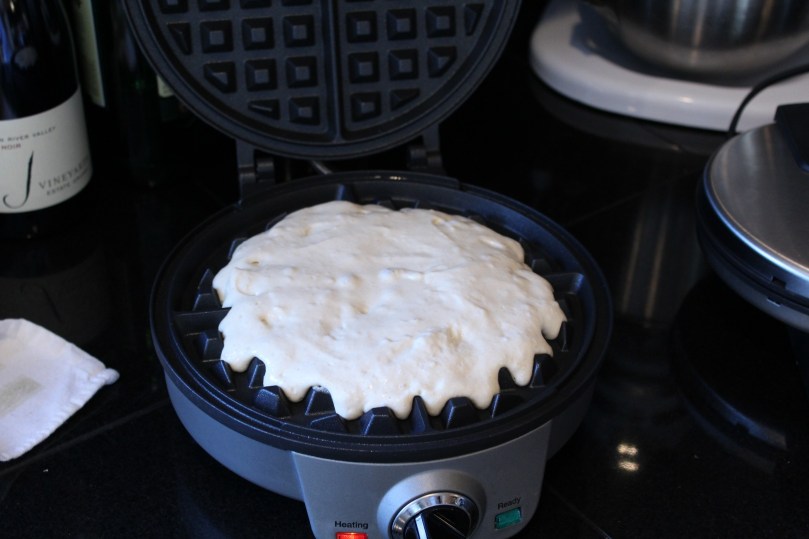
When your waffle iron is done preheating, open it up, and pour in your batter using a measuring cup. The amount of batter you’ll need depends on your waffle maker. The waffle maker will beep, and/or have a green light go on when the waffle is done cooking. But there’s not hurt in checking manually beforehand to see if the waffle is done.
Repeat this cooking process however many times it takes to finish your batter. If you will not be eating your waffles right away, but will probably eat it in 10 – 30 minutes after cooking (which is not necessarily recommended), preheat oven to 170 degrees, and line the rack with some parchment paper. Place your cooked waffles in this warm place until ready to eat.
If you do this, though, chances are that the waffles won’t be as crispy as they were right out of the waffle maker.
Serve with syrup, and/or fruit jam…
…or however you like eating waffles.
NOTE:
You can use a special egg separator like I do if you prefer that over doing it with the egg shell, which is harder. You can buy an egg separator here: At Amazon
Scroll down to see some step-by-step pictures.
RECOMMENDED WAFFLES IRON(S):
If you don’t have a waffle maker, and you are interested in buying one, see below:
I use a Cuisinart Belgian Waffle Maker, which is a really nice, large, deep waffle maker that makes great waffles, for $60.
I also use (behind the scenes) a Cuisinart Classic Waffle Maker that works perfectly fine, too, for half the price as the Belgian Waffle maker. The difference? This $30 classic waffle maker is a lot smaller, and less deep, and so it holds less waffle batter. It also doesn’t BEEP when the waffle is done cooking.
I recommend the Belgian waffle maker if you don’t mind spending the money for it.
If you’re on a budget, however, and don’t have many mouths to feed, I’d personally recommend the Classic Waffle Maker.
See the links above.
Separating the eggs…Egg whites after being whipped.Waffle batter poured.